Clinic Tips with Buzzton! Clubfoot Terminology

Clubfoot means a baby is born with a foot or both feet turned inward. This common condition makes it hard for kids to stand or walk the usual way. With the right treatment, most children grow up able to run, play, and join in all the fun life offers.
Parents often feel worried after hearing the word “clubfoot,” but you are not alone. Doctors understand clubfoot well and many helpful treatments are available. Learning about these treatments can help families feel informed and hopeful as they get their child the care they need.
Once clubfoot is diagnosed, families start to look at what can be done to help their child’s foot get into a corrected position and become stronger. There are a few main treatment options, each with its own steps and reasons. Getting familiar with these choices lets parents feel more in control and ready for what comes next.
The Ponseti Method is the most common and consider the gold standard of clubfoot treatment around the world. Doctors use it for most babies as soon as possible after birth.
Here’s what happens with the Ponseti Method:
The Ponseti Method works well for most babies because it is gentle, does not require big surgery, and lets kids use their feet normally as they grow. Doctors pick this method first because it has a high success rate, low risk, and helps most children avoid surgery.
Some families and doctors choose a different path called the French Functional Method. This approach uses hands-on physical therapy instead of repeated casting and is only available in certain locations.
With the French Method:
The French Functional Method can work well when the doctors and therapists are trained and experts in this method. It is best when families are motivated and can come to therapy often. Over time, this method can help the foot grow straighter by teaching muscles and joints to move in healthier ways.
Parents choosing this option can expect a lot of at-home work and a strong partnership with their therapy team. If the foot is not improving as hoped, sometimes doctors will switch to the Ponseti Method partway through care.
Surgery used to be the main way doctors treated clubfoot, but this has changed. With better results from the Ponseti and French methods, surgery is now a backup plan.
Doctors think about surgery when:
Clubfoot surgery can mean a few different things. Sometimes, it’s a small procedure to release a tight tendon. Bigger surgeries can involve moving or lengthening muscles, tendons, or even cutting bones. These surgeries help bring the foot into a better position but sometimes lead to stiffness, pain, or trouble moving the foot as the child grows.
Doctors only recommend major surgery when other treatments do not help. Today’s approach is to avoid surgery when possible, as gentle early treatments give most kids the best chance for strong, flexible feet.
After a diagnosis, the focus shifts to how to help babies with clubfoot grow and develop as normally as possible. Early and proper treatment sets kids up to walk, run, and play with little or no limits. Parents often feel overwhelmed at first, but clear steps and steady routines can make a big difference for newborns facing clubfoot and parents first learning about the diagnosis.
Treating clubfoot works best when started soon after birth. The first days and weeks are when babies have very soft bones and tissues, so gentle corrections are easier and cause less discomfort. Starting early also keeps babies on track with their movement milestones.
Doctors usually begin treatment in the first one or two weeks of life. If clubfoot goes untreated, the foot becomes stiffer and harder to correct over time, which might lead to more complex treatments later.
The Ponseti Method has become the main way doctors treat clubfoot. It is known for being gentle, safe, and highly effective. Parents play a huge part in making it a success. Here are the main steps, explained in simple terms:
These steps allow the baby’s foot to reshape and grow like a healthy foot. Skipping or shortening these steps can cause clubfoot to return.
Success in clubfoot treatment often comes down to simple, steady steps at home. Parents become the most important team members. Here are some best practices for making sure treatment works:
Kids are naturally curious and often pull at their braces, but families who stay patient and consistent see the best long-term results.
Ongoing communication between the family and the care team helps keep treatment on track. Doctors, nurses, and therapists support parents with advice, coaching, and help if problems pop up. Parents often become experts in their child’s care and learn to spot small changes before they become bigger issues.
Families can ask questions like:
Reliable, open communication supports a child’s journey from treatment to healthy, active play.
Many parents worry about keeping their baby comfortable during treatment. While babies often adjust quickly, a few tips help make casts and braces easier for both baby and family:
Each family’s day-to-day life looks different, but small changes to routines can add up for comfort and success.
Regular follow-up visits let your care team watch your child’s progress and catch problems early. Most families visit the clinic several times in the first year, then less often as the child gets older.
Here’s a sample timeline for clubfoot check-ins:
| Stage | Clinic Visit Frequency |
| Serial Casting | Every week |
| Transition to Bracing | Every 1-3 months |
| Ongoing Bracing | Every 3-6 months |
Seeing steady improvement with each visit builds both parent and child confidence in the treatment process. Parents may want to keep notes about brace time, skin changes, or anything that feels off—this helps guide each appointment.
With early action, partnership, and a steady routine, nearly all children treated for clubfoot go on to walk, run, and keep up with their peers. Treatment is a journey, but every step forward adds more hope and strength to a child’s future.
Treatment for clubfoot does not finish when the last cast comes off or when bracing slows down. Ongoing care gives kids the best chance at a healthy, active life. By following up with your care team and sticking with a long-term plan, you build strong habits that protect your child’s progress. Let’s look at what families need to know about follow-up visits and how clubfoot care shapes a child’s future.
Regular check-ins with your doctor are key for clubfoot care. The risk of the foot turning inward again is highest in the early years. Sticking to follow-up visits helps catch any signs of relapse early and adjust treatment if needed.
During these visits, your care team might:
A simple delay in these visits can lead to bigger problems later, so building them into your family’s life is important.
You know your child better than anyone else. You see changes before anyone else does. Keep an eye out for these warning signs between check-ups:
If you spot any of these, inform your doctor. Quick action can lead to easy fixes instead of bigger setbacks down the road.
Kids treated for clubfoot want to keep up with their friends at school and on the playground. Most can run, play sports, and do what other children do. Families help young children build confidence by encouraging active play and healthy movements.
Here are some easy tips:
Some children need special stretches or exercises as they grow. Your care team will show you what to do at home if needed.
Even after early treatment, clubfoot can return. This is called a relapse. Almost all relapses happen because the brace is not used as much as needed in the early years. Staying on track with bracing and follow-ups keeps relapse rates low.
Ways to prevent relapse:
If relapse happens, many cases can be treated with more casting or gentle stretching. Rarely, a minor surgery is needed. Quick action makes recovery much easier.
With modern treatments like the Ponseti Method, the long-term outlook for children with clubfoot is bright. Most children grow up with feet that function almost like anyone else’s. Some may have minor differences such as a slightly smaller calf or a foot that is not as flexible, but these rarely slow them down.
Here is how long-term outcomes look for most children treated for clubfoot:
| Outcome | What Families Can Expect |
| Walking/Running | Normal for almost all children |
| Playing sports | No limits for most kids |
| Pain or stiffness | Rare with early and steady care |
| Shoe choices | In rare cases special shoes |
| Recurrence risk | Low when bracing is followed |
Your partnership with doctors, steady routines, and belief in your child’s strength will make a big difference in long-term results. Every family’s journey is unique, but strong follow-up care gives the best chance for active, happy years ahead.
Early action gives children with clubfoot the best chance for healthy, happy lives. Modern treatments like the Ponseti Method help most kids walk, run, and play with their friends. The key steps: diagnosis, gentle stretching or casting, and steady follow-up—build a strong path to success.
Families who work closely with their care team see real progress. Every step taken, from that first cast to the last brace, leads to more freedom and confidence. Clubfoot may feel overwhelming at first, but hope and progress go hand in hand for families who seek help early.
Thank you for taking the time to learn about clubfoot and its treatment. If your child has been diagnosed, know that you are not alone and that support is always available.
Disclaimer:
OPSB products should be used under the guidance of a qualified healthcare professional. Individual results may vary. Please consult your pediatrician or orthopedic specialist for professional advice. This article is for informational purposes only and does not constitute medical advice. Always follow your doctor’s recommendations and instructions.
IAM-MM-046
When a child is born with clubfoot, the journey through treatment can feel overwhelming. Knowing what to expect, who is involved, and how each step works can bring comfort and confidence for families. This guide breaks down the treatment process from the first Ponseti cast to ongoing follow-up care, focusing on how orthotists and the rest of the medical team work together for the best results.
Idiopathic clubfoot is a condition in which a child’s foot is turned inward and downward. It is not caused by anything done by the mother. Early treatment can correct the position, helping kids walk and play comfortably as they grow. The first phase usually starts within weeks of birth with the Ponseti method, a proven technique using a series of casts to gently guide the foot into the correct position.
Once the orthopedic surgeon removes the final set of Ponseti casts, the next phase begins. This is where orthotists and specialized clinics, like OP Specialty Bracing, step in. On this same day, the child is evaluated, measured, and fitted for Mitchell sandals and a foot abduction bar (a bar that spreads the legs and feet).These devices hold the feet in the right position, protect the correction, and help prevent clubfoot from coming back.
This approach supports the work of the casting process. It’s like handing off a baton in a relay race—the next champion takes their place so the progress made isn’t lost.
A certified orthotist is a key member of your child’s care team. Orthotists take careful measurements and make sure the fit is just right. They also check the bar that connects the shoes and adjust the width to match your child’s needs. Their goal: keep the feet in a healthy position, protect skin, and set your child up for success.
The relationship between the orthotist and your orthopedic surgeon shapes the treatment path. They share notes at each visit and coordinate on every detail—from fit checks to bar width. When adjustments are needed, they decide together. This teamwork helps catch potential issues early and makes sure the treatment plan matches your child’s progress.
Follow-up appointments are as important as the first fitting. Your orthotist will schedule regular visits every 3 to 6 months to:
Your orthotist is a guide, problem-solver, and support person as you move through each stage. Make sure you have his/her contact information as the orthotist is a great resource for brace and skin care questions.
After the casting phase, Mitchell sandals (special shoes used in clubfoot care) and the foot abduction bar become your child’s main line of defense against relapse.
Mitchell sandals are lightweight, open-toe shoes designed for comfort and correction. The sandals attach to a metal or plastic abduction bar. The bar holds your child’s feet in an outward, outward-rotated position, stopping the foot from turning inward again.
A consistent routine with Mitchell sandals and the abduction bar prevents old habits from returning. This gives your child the best shot at a permanent fix.
Once your child leaves the clinic in their new sandals and bar, the work isn’t done. Ongoing monitoring gives early warning if problems start or the fit changes. Think of these visits as tune-ups to keep your child’s progress on track.
Your clinic stays in close contact with your orthopedic surgeon. They may coordinate visits or discuss your child’s progress together. Decisions about how long to keep up the 23-hour wear or when to switch to nights-only will be a shared choice.
Questions or concerns rarely wait for scheduled appointments. That’s why clinics provide both email and phone contacts so families can reach out anytime:
Patients and parents are never left on their own. Open communication is encouraged. Many clinics invite families to stay in touch for any adjustments or skin issues, helping build a safety net and peace of mind.
Treating clubfoot is a team sport. Every expert—from the surgeon to the orthotist and the parents—plays an important part. This team approach keeps treatment safe, comfortable, and successful.
Roles of the Clubfoot Treatment Team:
How teamwork helps:
Think of each expert as a point along a circle, all linked together with parents and child at the center. Open communication between parents, surgeons, and orthotists keeps the wheel turning smoothly and moves treatment forward.
Raising a child with clubfoot is a learning process. Here are practical tips to help you and your child adjust to treatment:
Parent Tips for a Successful Clubfoot Journey:
Remember, every child may have a slightly different path. Stay in touch with your clinic and feel empowered to advocate for your child’s comfort and health.
Clubfoot treatment is most successful when everyone works together. The journey begins with skilled surgeons and Ponseti casts, continues with careful fitting by an orthotist, and is supported by parents who maintain daily routines at home. Open communication and regular check-ins help catch small issues before they become big ones.
With ongoing support, a clear plan, and a team committed to your child’s well-being, families can move through each phase of clubfoot treatment with confidence. For more information, updates, and support as your child grows, consider following OP Specialty Bracing on YouTube and staying connected with your care team.
Disclaimer:
OPSB products should be used under the guidance of a qualified healthcare professional. Individual results may vary. Please consult your pediatrician or orthopedic specialist for professional advice. This article is for informational purposes only and does not constitute medical advice. Always follow your doctor’s recommendations and instructions.
IAM-MM-049
Clubfoot is a common birth defect where a baby’s foot turns inward and downward. The good news, when treatment starts in the first weeks of life, most children grow, play, and move with confidence.
Today, the Ponseti method is the gold standard, non-surgical approach. It follows clear clubfoot treatment phases: casting to gently guide the foot into position, a quick tenotomy to release a tight tendon, and bracing to hold the correction as your child grows.
In this post, you’ll see what each phase involves, how long it may take, and what parents can do at home. We’ll cover weekly casts, what to expect on tenotomy day, and how to make bracing easier for your baby. You’re not alone, and there’s a proven plan ahead.
The clubfoot casting phase is the start of the Ponseti method. A specialist guides the foot into a better position each week, then holds that progress with a cast. Most babies need 5 to 6 casts, changed weekly, to reach the right alignment. When started early, this approach corrects clubfoot in about 90 percent of cases and helps families avoid major surgery.
Each visit follows a calm, predictable rhythm. Knowing the flow makes it easier for you and your baby.
Progress is checked at every visit. The foot should abduct more each week, and the heel moves into a straighter position. If equinus remains after the final cast in this series, a small tendon lengthening is often planned next to release the tight Achilles, followed by a final cast.
Quick home tips that make a big difference:
Parents ask smart questions. Here are clear answers you can trust.
Ways to soothe your baby during cast changes:
Example that sets expectations: Many families notice the foot looks straighter after the second or third cast. By week five, the foot usually points forward with a flatter heel. That steady, gentle progress is the goal throughout the casting phase.
A clubfoot tenotomy procedure is a brief, targeted step that finishes the correction started by casting. It releases the tight Achilles tendon so the foot can dorsiflex, which means toes can lift toward the shin. Most babies have this minor surgery around week 6 to 8 of treatment, after adduction and heel position have improved with casts. It takes only a few minutes, uses local anesthesia, and avoids major surgery.
What to expect: your provider makes a tiny incision or uses a needle to cut the tight tendon, then places a final cast to protect healing. After three weeks, your baby moves into bracing to hold the full correction.
Good prep and simple aftercare make the day smooth and calm.
Before the procedure:
What happens during tenotomy:
After the procedure:
Follow-up timeline:
The cast’s role in healing:
Quick reminder for parents:
Casting brings the foot close to straight, but the tight Achilles often blocks the last bit of upward motion. Tenotomy solves this bottleneck. By releasing the tendon, the heel drops, the ankle flexes up, and the foot reaches the final position needed for stable bracing.
Key benefits:
What outcomes look like:
Short success snapshot:
Think of casting as steering the foot into line, and tenotomy as releasing the parking brake at the end. Once the brake is off, the foot can reach the right position, and bracing keeps it there as your child grows.
The clubfoot bracing phase holds the hard-won correction from casting and tenotomy. A foot abduction orthosis (FAO) keeps your child’s feet pointed in the right direction while bones, tendons, and ligaments grow. Most families use the brace almost full time at first, then for sleep only for several years. Consistent wear lowers the chance of relapse and sets your child up for normal walking and play.
Recommended wear schedule at a glance:
| Phase | Hours per day | Typical duration |
| Full-time | 22 to 23 hours | First 3 months after final cast |
| Nights and naps | 12 to 14 hours | For several years |
Why it matters: studies have shown that relapse rates can be over 30% percent when bracing is not followed. High compliance is the difference-maker.
Most children use a Ponseti-style FAO, also called boots-and-bar brace. It is simple, sturdy, and designed to hold the feet in the corrected position.
How the standard brace works:
Typical angle settings:
Fit and daily use tips:
Adjustments for growth:
Variations you may see:
Cleaning and storage:
What to do if something feels off:
The first weeks can feel like a big change. A simple routine makes it easier for you and your baby.
If your baby is fussy:
If you see skin irritation:
If the brace feels heavy or awkward:
Ways to boost compliance:
Make the hours fly with small wins:
Stay connected:
Long-term payoff:
Casting corrects the foot, tenotomy unlocks ankle motion, bracing maintains alignment during growth. With early care and steady brace wear, clubfoot treatment success is the norm. Most kids walk, run, and play like their friends.
Disclaimer:
OPSB products should be used under the guidance of a qualified healthcare professional. Individual results may vary. Please consult your pediatrician or orthopedic specialist for professional advice. This article is for informational purposes only and does not constitute medical advice. Always follow your doctor’s recommendations and instructions.
IAM-MM-042
Clubfoot is a common birth difference that twists a baby’s foot inward and downward. The Ponseti method gently corrects it with a series of casts, then a small procedure (called Achilles tenotomy) for most babies, and long-term bracing. The casts create the correction. The braces help keep it in correction.
If you feel nervous about the brace phase, you are not alone. Parents worry about fit, sleep, skin, and how long this will last. The good news is that braces are safe, proven, and very effective when used as directed.
Here’s what this post covers in plain language. How the brace works, how many hours to wear it, and what a good fit looks like. Skin checks, socks, and comfort tips. What to do if the brace slips, squeaks, or your baby cries. When to call your care team.
You will also find practical advice for daily life. Nap routines, nighttime stretches, and diaper changes. Bath time, travel, daycare, and growing shoe sizes. Simple tweaks make a big difference.
This guide draws on expert guidelines and real parent experiences, so you get both the why and the how. You will see what to expect in the first weeks, then during maintenance. Clear steps help you stay consistent without second-guessing.
You’ve already done the hard part by starting treatment. With the right brace habits, most families see strong, lasting results. Let’s take the worry out of this next step and answer your most common questions with clarity and care.
Ponseti braces are simple, smart tools that protect the correction made by casting. The brace is a bar connected to two lightweight boots. The boots hold the feet in an outward, upward position that matches the corrected shape. Think of it as a gentle trainer that keeps the feet pointed in the right direction while your baby grows.
The goal is not to push hard. The brace maintains the stretch that the casts created, then uses growth to your advantage. Tendons and soft tissues adapt slowly over time. With steady positioning, the corrected foot learns its new shape, which lowers the risk of relapse.
Most babies begin bracing right after the final cast, often around 3 to 4 months old. At first, the brace is worn full time as advised by your care team, then at night and naps for several years. This schedule supports natural foot growth during key stages.
Here is how it works in practice:
Surgery tries to correct shape by cutting or moving tissues. Ponseti bracing supports correction without cutting. That means less pain, fewer complications, and a focus on normal growth. When used as directed, it guides the foot with calm, predictable forces instead of forceful fixes.
Parents often ask why a bar and boots are still used today. The answer is science and results. The brace aligns the foot with the line of growth. It provides a constant, low load that tissues accept well. Over time, that steady cue helps the corrected foot stay flexible, strong, and ready for play.
Bracing works for most families and most feet. When paired with proper casting, published clinical data show over 90% correction without major surgery. Large multicenter reports and international clubfoot groups have confirmed these results across different settings.
Key advantages for your child and your budget:
Some parents worry the brace looks old-fashioned or might not be enough. Current guidelines and studies still favor bracing after casting because it prevents relapse better than any other option. The method is modern in its results, simple in its design, and kind to babies.
If you want the safest path to a stable, flexible foot, bracing after Ponseti casting is the standard for a reason. It protects the work already done, supports natural growth, and helps your child move into toddler life with confidence.
Most families follow a clear plan. Right after the last cast, babies wear the brace full time, 23 hours a day, for about 3 months. After that, the schedule shifts to nights and naps for several years. This routine keeps the correction your team worked hard to achieve.
Care teams may adjust timing based on your child’s foot, age, and growth. Some kids stay on full-time wear a bit longer if the foot was very stiff. Others move to nights and naps sooner if progress is strong and consistent. Your orthopedist checks angles, range of motion, and skin, then fine-tunes the plan.
Helpful ways to stay on track:
Most families say the shift to part-time wear feels like a win. Sleep improves, days feel lighter, and the habit sticks. One parent shared that a calendar with stickers kept their toddler excited. Another used a phone reminder, and the brace became part of the bedtime story.
Relapse is the main risk. The foot can drift inward again if the brace is not used as prescribed. That can lead to recasting, extra clinic visits, and, in some cases, surgery. Published studies link poor brace use with higher relapse rates. Strong adherence keeps correction in place, with success often above 90%.
The goal here is prevention, not pressure. Families who hit bumps early often get back on track with support. Small fixes help a lot, such as better socks, a fit check, or a new nap routine. Many parents report that once comfort is solved, nightly wear becomes second nature and stress drops fast.
Most children stop around school age, but rarely beyond age 4 and 5 years. The team will taper use as your child grows, then reassess at follow-ups. Signs of readiness include flexible ankles, a straight foot, and no inward drift after long play days.
Even after bracing stops, your child still gets periodic checks. This is normal. Kids run, jump, play sports, and outgrow shoes fast, so quick check-ins protect long-term results. The great news, backed by long-term outcomes, is that most kids move on to active, full lives with strong, pain-free feet.
Small tweaks make bracing easier for you and your child. Build a simple routine, choose soft layers, and keep checks quick. The goal is steady wear with calm, happy days.
Babies fuss for many reasons. Comfort first, then check the fit. Quick fixes help most families.
Feet grow fast, which means regular checks and small adjustments. Plan quick fit checks each week and growth checks every few months.
Clubfoot braces do the quiet work that keeps correction strong. Consistent wear, good fit, and simple routines protect the progress earned through casting. Small issues respond well to early tweaks, which keeps nights calm and results steady.
Stay in close touch with your orthopedist or physical therapist. Ask for fit checks, skin guidance, and schedule updates as your child grows. Use reputable resources, like your clinic’s education materials, national clubfoot groups, and parent communities that share real-world tips.
Most families report what matters most. Kids walk, run, and play with confidence after the Ponseti plan. Keep going, stay consistent, and celebrate each easy bedtime and smooth morning.
Have a question or a tip that helped your family? Share your experience in the comments, and consider joining a clubfoot support group to keep the momentum and the encouragement going.
Disclaimer:
OPSB products should be used under the guidance of a qualified healthcare professional. Individual results may vary. Please consult your pediatrician or orthopedic specialist for professional advice. This article is for informational purposes only and does not constitute medical advice. Always follow your doctor’s recommendations and instructions.
IAM-MM-042
Clubfoot is a condition where a baby’s foot turns inward and downward. It happens before birth, and about one in every one thousand babies is born with it. While it sounds serious, most children with clubfoot can walk, run, and play after treatment.
Parents and caregivers often wonder why clubfoot happens. The truth is that there isn’t just one reason. Family history, changes in baby’s growth before birth, and other factors may play a role. Learning what causes clubfoot helps families know what to expect, find support, and make informed choices for their child’s care.
Some babies are born with clubfoot because of changes in their genes. Genes carry instructions that shape how our bodies grow, including our feet. When certain pieces of this genetic code change, clubfoot can happen. Understanding the genetic causes gives families more answers about why this condition appears.
Having a family member with clubfoot raises the chance that a baby could be born with it too. Sometimes, clubfoot runs in families. If a parent or sibling had clubfoot, the risk increases, though most babies with clubfoot have no family history at all.
Doctors believe that genes from both parents can play a part. These genes can pass along tiny changes that make clubfoot more likely. Still, clubfoot can also develop in families with no known cases before.
Research has found some gene changes that may lead to clubfoot. Scientists have looked at the genetic makeup of children with clubfoot and found several genes that could be involved. These changes might affect how muscles, bones, or tissues in the feet form before birth.
Key facts about genetic changes and clubfoot:
Doctors usually do not test for these genes, but learning about them helps scientists understand more about what causes the condition.
In rare cases, clubfoot appears as part of a larger genetic or chromosomal condition. This means clubfoot is just one sign of a broader health issue.
A few chromosomal conditions that may include clubfoot:
| Condition | What It Involves |
| Trisomy 18 | Causes many differences in growth and development, including clubfoot |
| Arthrogryposis | Joints are stiff; clubfoot is common |
| Spina bifida | Spinal cord does not form correctly; clubfoot can occur with it |
Doctors may look for these conditions if a baby has clubfoot plus other unusual signs at birth.
Genes alone do not always cause clubfoot. Other things, like how the baby grows before birth, also play a role. Think of it like a recipe: genes are the main ingredients, but the way they mix with other factors can change the result.
Most cases of clubfoot happen for a mix of reasons. Genetic changes may set the stage, and other environmental factors can tip the scale. This is why even with one or more family members who had clubfoot, not every baby will have it.
Knowing about genetic causes can help families talk openly with doctors. If there are worries about clubfoot running in the family, doctors can give more advice or offer support during and after pregnancy.
Clubfoot can develop for many reasons, and genetics are only part of the story. The baby’s environment during pregnancy also plays a role. Sometimes, what happens in the womb or certain pregnancy conditions might increase the chances that a baby will be born with clubfoot. Parents should remember that most of these factors are outside of anyone’s control, and nothing a parent did or didn’t do usually causes this condition.
Sometimes, clubfoot is not the only health concern a baby has at birth. It can show up as part of a group of symptoms or a bigger health issue doctors call a “syndrome.” Other times, clubfoot is found all by itself, with no other medical problems. Most children with clubfoot have what’s called isolated clubfoot.
Some health problems and syndromes more often linked with clubfoot include:
These conditions may change how a doctor treats clubfoot. Babies with extra health needs often work with a team of specialists for steps like therapy, braces, or surgery.
Even so, most cases of clubfoot are not tied to a syndrome or another disease. When this is true, doctors call it isolated clubfoot, meaning it happens on its own and the outlook for treatment is usually very good.
Hearing that your baby has clubfoot can bring up a lot of feelings and questions. It’s easy to see why stories and myths about what causes clubfoot have spread over the years. These old ideas can make parents feel guilty or confused. Getting the facts helps families let go of blame and focus on caring for their child. Let’s clear up some of the most common myths.
One of the biggest myths is that mothers cause clubfoot by how they sit, sleep, or move during pregnancy. Some people believe that crossing your legs or resting in a certain way puts pressure on the baby’s feet. This is not true.
Clubfoot does not happen because of sitting “wrong,” wearing tight clothing, standing up too much, or not exercising enough. The position or actions of the mother during pregnancy do not cause a baby’s feet to turn in. Most cases start before birth due to reasons that parents cannot control, such as changes in genes or early growth patterns.
Many parents worry that a fall, bump, or accident while pregnant caused their baby’s clubfoot. Even though it makes sense to wonder, research shows that simple accidents or minor falls do not cause clubfoot.
Here is what experts know:
Hearing this truth helps parents understand that clubfoot is not caused by something they could have avoided.
Some people claim that not eating enough healthy foods during pregnancy leads to clubfoot. While a balanced diet is important for many reasons, clubfoot rarely ties back to nutrition alone.
Doctors agree that:
This takes pressure off families and focuses the conversation on support, not blame.
There is a story that if the baby’s feet get “squished” in the womb because of twins, less amniotic fluid, or a small uterus, then clubfoot will appear. While low amniotic fluid can cause joint stiffness, tight quarters such as big babies and twins do not increase the chance of clubfoot.
In most cases:
Here is a quick table that breaks down some facts:
| Myth | What the Facts Say |
| Caused by how the mother sits or sleeps | Not true; position or movement does not cause clubfoot |
| A fall or injury during pregnancy | Not true; injuries are not a cause |
| Poor nutrition | Rarely a factor; most cases not related to diet |
| Tight spaces in the womb | Sometimes linked, but not the main cause |
Some people believe that babies born with clubfoot will never walk or play like other children. This myth can be very scary for new parents. This is not true!
With early treatment and care, most children with clubfoot learn to walk, run, and join in all the things other kids do. Braces, gentle casts, or sometimes minor surgery can correct the foot’s shape. Families should know that clubfoot is a challenge but not a roadblock to a full and active life.
Clarity about these myths gives parents peace of mind. Knowing what does not cause clubfoot is just as important as understanding what does.
Understanding how clubfoot is diagnosed puts families in a stronger place to act quickly. Once a doctor suspects clubfoot, either before or after birth, clear steps follow to confirm the diagnosis and start care right away. Parents will see that early action makes a big difference in a child’s outcome. Knowing what to expect next helps everyone feel more confident during an emotional time.
Doctors often notice clubfoot just by looking at a newborn’s feet. The foot’s turned-in shape is easy to see. Sometimes, clubfoot is first spotted before birth during a routine ultrasound. Ultrasounds create pictures that can help doctors see if the baby’s foot has an unusual position, especially late in pregnancy.
If clubfoot is found during pregnancy, parents have time to learn more and plan with specialists. When the doctor identifies clubfoot after birth, they will carefully check each foot’s movement and shape. Usually, no blood tests or scans are needed to make the diagnosis.
Here’s a look at how clubfoot is usually found:
Once a doctor says a baby has clubfoot, the focus shifts to treatment choices and next steps. Most doctors act quickly so treatment can start in the baby’s first weeks. Early care gives the best results and helps the child’s foot grow in a more natural way.
This is what families can expect next:
The first weeks after diagnosis often fill up with appointments and new routines, but each step brings big progress. Taking quick action lowers worry and gives each child the best chance at an active future.
Starting treatment early means the baby’s bones and muscles are soft, so gentle methods work best. Most children use a series of casts, changed every week, to slowly move the foot to a normal position. After casting, a baby usually wears a special brace, called boots and bar, to keep the foot in the right place as it grows.
Treatment steps at a glance:
This steady rhythm of visits and care gives children strong feet for walking, running, and playing when they are older. Parents learn each part of the process alongside the care team.
Families often find hope in seeing weekly changes and celebrating small wins. While the journey can be long, seeing a child’s foot and confidence grow is worth every visit and cast change.
Clubfoot is no one’s fault. With early treatment and the right care, children with clubfoot grow, play, and thrive just like any other kids. Parents who learn about the causes can focus on hope instead of blame.
Reach out to your doctor, ask questions, and look for support when you need it. Families are not alone in this journey. Every step forward helps build a brighter future for your child.
Disclaimer:
OPSB products should be used under the guidance of a qualified healthcare professional. Individual results may vary. Please consult your pediatrician or orthopedic specialist for professional advice. This article is for informational purposes only and does not constitute medical advice. Always follow your doctor’s recommendations and instructions.
IAM-MM-045
Hearing the word “clubfoot” from your child’s doctor can feel overwhelming, but you’re not alone. Clubfoot is a foot condition present at birth. It causes the foot to turn inward or downward, and it affects about 1 in every 1,000 babies. With the right care, most children treated early grow up to walk and play just like other kids.
Spotting clubfoot early helps your child get the care they need. In this post, you’ll find clear signs to watch for, learn how doctors confirm clubfoot, and see what happens during that first appointment. Knowing what to expect can ease worries and help you feel ready for what comes next.
Clubfoot is a medical term for a foot that is twisted out of shape or position. It was not caused by anything the mother is not simply because the foot was squished. At birth, a baby with clubfoot has a foot that turns sharply inward or even points down. Even though it looks uncomfortable, most babies with clubfoot do not feel pain because they have never walked on it. Clubfoot is one of the most common foot problems seen in newborns and can affect one or both feet.
Clubfoot can be easy to spot. The main thing you notice is the foot’s unusual shape. The foot may seem like it is twisted so the bottom faces sideways or up, instead of downward. Often, the calf muscles on the affected leg are smaller compared to the other side. Parents should know that clubfoot is a physical condition; it is not a sign of any problem with intelligence or mood.
There are a few key points about clubfoot:
Doctors use the word “clubfoot” to describe several related shapes that feet can take. Clubfoot usually falls into two types:
Knowing the difference helps doctors guide treatment right from the start.
Doctors do not know exactly why clubfoot develops, but they believe both genetics and environment matter. If someone in the family has clubfoot, chances go up.
Several factors linked to clubfoot include:
Most of the time, though, clubfoot happens with no known cause. It is nobody’s fault.
Spotting idiopathic clubfoot is pretty clear when you know the signs. Here’s what parents and doctors notice most:
This table shows some main features and how they appear in clubfoot:
| Feature | How It Appears |
| Foot Direction | Inward and/or downward twist |
| Heel Position | Upward or tilted |
| Arch Shape | High arch, or even no arch |
| Calf Size | Smaller on the affected side |
It is important to remember that clubfoot itself can look dramatic, but children with this condition often go on to live active lives once treated.
When a baby is born with clubfoot, the signs usually stand out during the first checkup. Parents often see the shape and direction of the foot is not like other babies. Understanding these symptoms helps families spot clubfoot early, which is key for starting care. Here are the most common symptoms you might notice from day one.
Unusual Foot Shape
Clubfoot is known for its unusual foot shape. The foot may turn sharply inward, downward, or both. Sometimes, the foot curves so much that the bottom faces sideways or even up. This twist is firm and does not move back to a normal position when you try to gently straighten it.
Rigid Position
Babies with clubfoot often have a foot that feels tight or stiff. You cannot easily move or stretch the foot into a normal position with your hands. Even when you try, the foot snaps back to its twisted shape. This tightness is because the tendons and muscles on one side of the foot are shorter and tighter.
Calf Muscle Difference
Another clear sign of clubfoot is that the calf muscle on the affected leg is thinner. You might see one calf looks slimmer or less filled out. This is not painful for the baby, but it shows that the leg muscles did not grow the same way during pregnancy.
Shorter Leg or Foot
Parents or doctors sometimes see a mild difference in leg length. The affected leg or foot can be a bit shorter. This happens because clubfoot limits how the bones and muscles grow. This does not need treatment and most of the time, this difference is small and only noticed during a close check.
Foot Skin Creases
There may be extra skin folds or deep creases on the bottom, the side of the foot, and/or over the heel. These lines appear because the skin folds over itself as the foot turns in. These creases often stay until the foot is treated.
Clubfoot Symptom Checklist
Quickly spotting the common symptoms helps start care right away. Here’s a simple checklist parents and doctors often use:
Symptom Summary Table
This table helps you see the key clubfoot symptoms at a glance:
| Symptom | What to Look For |
| Inward/Downward Foot | Foot curves in or points down |
| Rigid Position | Stiff, hard to straighten |
| Thin Calf Muscle | Slimmer calf on affected side |
| Shorter Foot/Leg | Foot or leg looks slightly shorter |
| Deep Skin Creases | Extra folds or lines on the foot |
Knowing these symptoms gives parents and caregivers confidence to act fast and ask questions if they see any of these signs in a newborn’s feet. Trust your instincts and mention anything that does not look right during those first doctor visits.
Getting a clear diagnosis of clubfoot helps your child get the right care quickly. Doctors use a hands-on exam, careful questions, and sometimes special tests to confirm clubfoot. This process can start right after birth or, in some cases, even before your baby is born. Knowing what happens during diagnosis helps you feel more prepared for your first visit.
Most of the time, doctors diagnose clubfoot by looking at and moving your baby’s feet. This exam is simple but important. The doctor looks at the shape and stiffness of the foot, how far it turns inward, and checks the skin and muscles.
During the exam, you may notice the doctor:
Doctors also ask about family history and how your pregnancy went. This helps them see if other health problems could affect treatment.
Sometimes, clubfoot is seen before birth during a routine pregnancy ultrasound. If your doctor saw something on an ultrasound picture, they might have mentioned it during your pregnancy.
Key things about prenatal ultrasound:
Not every ultrasound finds clubfoot. Some babies are only diagnosed during the first exam after birth, so parents should not worry if it was not mentioned earlier.
In most cases, doctors do not need more than a physical exam to confirm clubfoot. But sometimes, if they have questions or want more details, they use imaging tests.
A table below shows the common tools used in clubfoot diagnosis:
| Tool or Test | Used For | Common? |
| Physical Exam | Main diagnosis method | Always |
| Prenatal Ultrasound | Early detection before birth | Sometimes |
| X-ray | Details on bone position | Rarely |
| Other Scans | Check for related conditions | Rarely |
Most families want to know what will happen when the doctor checks for clubfoot. Here’s a short list of common steps:
This checkup is usually quick, gentle, and does not hurt your baby. The doctor will share what they see, explain the next steps, and answer your questions. Knowing what the diagnosis involves helps you feel more confident and less anxious about your child’s care.
The first appointment can feel like a big day for parents and their child. Walking into the clinic, you might have a mix of worries and hope. Knowing what will happen during this first visit helps you prepare and stay calm. The care team is there to answer your questions and guide you every step of the way.
You will likely meet several people who work together for your child’s care. This team often includes:
They will greet you, ask your baby’s name, and make sure you feel welcome. The team wants you to know you are not alone and they have helped many families through this before.
Next, the doctor will examine your baby’s feet and legs. This part of the appointment is gentle but thorough. The doctor may do the following:
If you have seen any new changes or signs at home, share them. The doctor will also ask about your pregnancy, any family history of clubfoot, and how your baby is doing overall.
Once the exam is done, the doctor explains what they see. They will use simple words and avoid medical jargon. You should expect to hear:
Doctors understand these words can sound new. Do not be afraid to ask for plain explanations, or repeat what you hear to be sure you understand.
The doctor will talk about the diagnosis clearly and address your concerns. If there is any doubt, or if extra testing is needed (like an X-ray), the doctor will explain why. Often, diagnosis is based mainly on what they see and feel during the exam.
Sometimes you may hear the words “mild,” “typical,” or “complex” to describe the clubfoot. The doctor may jot down notes or use drawings to help you see what’s going on inside your child’s foot.
By the end of your first visit, the team will outline what happens next. Most doctors use a step-by-step approach so you know what to expect. You might be told about:
Many parents leave with printed handouts, web links, or phone numbers for more questions. You will not leave empty-handed.
To make the most of your child’s first appointment, certain items or information can help:
Here is a quick checklist for parents getting ready for the first clubfoot visit:
Preparing ahead takes the stress out of a new experience. Doctors and nurses know this is a lot to take in and will give you clear answers, so you leave the appointment knowing what comes next for your child’s clubfoot care.
Once the doctor confirms a clubfoot diagnosis, the next step is to start treatment as soon as possible. Early action gives your child the best chance for strong, flexible feet and a normal life. Clubfoot treatments have improved greatly, with most children growing up to walk, run, and play just like their friends. Understanding what comes next will help you feel prepared and hopeful.
The Ponseti method is the most common and recommended treatment for clubfoot. Doctors across the world trust this gentle approach because it works well and uses careful hands instead of surgery for better outcomes.
Here is what the Ponseti method includes:
After the final cast, most babies need a small procedure called a tenotomy, where the doctor uses a tiny cut to release a tight tendon at the heel. This simple step helps the foot move up and down better. The doctor usually does this with local numbing medicine, sometimes light sedation, and it heals quickly.
Once the foot is in a better position, it is important to keep it from turning back. That is where bracing comes in. Babies wear a special brace called a “boots-and-bar” (BnB), your clinician may refer to it as a Foot Ankle Brace (FAB), for several months all day, then only at night for a few years. This keeps the foot straight as your child grows.
Some key points about bracing:
Wearing the brace is not painful, but your child may need time to adjust. Parents often find that sticking to the bracing plan is one of the most important parts of long-term success.
Some doctors will show you gentle stretching exercises to do at home, especially if the foot is very stiff or if treatment starts a little later than usual. Physical therapy may help improve strength and keep the foot flexible. Parents take an active role by helping with these stretches each day.
Most children with clubfoot do not need major surgery. However, if the foot does not straighten fully with casting and bracing, doctors may discuss surgical options. Surgery can help release or lengthen tight tendons and joints. The goal is to make the foot as straight and flexible as possible for walking and playing.
Surgery is less common now than it was years ago, thanks to better results with the Ponseti method. If surgery comes up, your care team will explain every step and answer your questions.
This table gives a quick look at common clubfoot treatments and what each involves:
| Treatment Step | What Happens | How Long |
| Ponseti Casting | Gentle stretching, weekly casts | 5-8 weeks |
| Tenotomy | Small heel tendon release (simple procedure) | Once, after last cast |
| Bracing (Boots-Bar) | Special shoes and bar to hold foot straight | 3 months full-time, then nightly for several years |
| Physical Therapy | Home stretches and exercises | Varies, some cases only |
| Surgery | Correction of tight parts (rare) | One-time, if needed |
Treatment for clubfoot is a team effort. Doctors, clinicians, and parents work together to guide your child week by week. Every visit brings progress, and parents play a big role in bracing and exercises at home.
Support is always available. Your care team knows this time can feel new and stressful, but they have seen many families walk a similar path. Asking questions, sharing concerns, and learning how to care for your child’s feet helps make each step easier. Every week of treatment brings your child closer to healthy, happy steps in the future.
Clubfoot may feel scary at first, but it is treatable and most kids go on to walk, run, and play just like anyone else. Early diagnosis, caring medical professionals, and the support of family make a strong difference in each child’s progress. Acting early can mean easier treatment and fewer worries over time.
Parents play a key role by asking questions, sharing concerns, and making sure their child gets the right care. If you notice anything unusual with your baby’s feet, trust your instincts and reach out to your doctor. You are not alone on this journey.
Disclaimer:
OPSB products should be used under the guidance of a qualified healthcare professional. Individual results may vary. Please consult your pediatrician or orthopedic specialist for professional advice. This article is for informational purposes only and does not constitute medical advice. Always follow your doctor’s recommendations and instructions.
IAM-MM-048


Worried about a foot that looks turned in at birth? Clubfoot means a baby’s foot points inward and downward from birth, and it is common and treatable. It is not your fault, and with early care most children walk, run, and play without limits.
Clubfoot is often found during a routine prenatal ultrasound, usually around the second trimester. If it is not seen before birth, your pediatrician or a pediatric orthopedist can diagnose it at the newborn exam. Sometimes only one foot is affected, sometimes both.
Early diagnosis leads to better outcomes, especially with the Ponseti method. This gentle approach uses a series of casts, a small outpatient procedure on the Achilles tendon in many cases, and bracing to guide the foot into a healthy position. Starting treatment in the first weeks sets kids up for strong, flexible feet.
This guide explains when clubfoot is usually diagnosed, how doctors confirm it, and what parents can expect next. You will learn who is involved, what tests are used, and the first steps after diagnosis. The goal is to ease worry with clear, practical facts.
If you are searching for clubfoot diagnosis for parents, you are in the right place. You will get plain answers you can trust, along with tips to prepare for appointments. Keep reading to feel ready, confident, and supported from day one.
Some cases are first seen on the mid-pregnancy ultrasound, usually around 18 to 22 weeks. Sonographers look at both feet during the anatomy scan and can spot a foot that points inward and downward. Detection rates are about 60 percent, which means some cases are missed until birth or flagged but later turn out normal. Early knowledge from early detection can help you plan care, but it is important to remember that if your child is diagnosed before or after birth, the time of diagnosis does not impact your child’s treatment or outcome.
During the standard anatomy scan, the sonographer reviews the baby head to toe. For the feet, they assess:
If a view is unclear, your provider may schedule a follow-up scan in a week or two. Fetal position, low amniotic fluid, a wriggly baby, or later gestational age can hide the feet. This is common. Ultrasound is non-invasive, safe, and routine.
Helpful questions to ask during or after the scan:
False positives can occur, especially if the foot is pressed against the uterus. Your provider will look for consistent signs before making a likely diagnosis.
If the initial scan suggests clubfoot and images are limited, your provider may consider:
Most families do not need advanced testing. Ask about the pros and cons, what each result would change, and whether a pediatric orthopedist visit during pregnancy would help you prepare.
Clubfoot diagnosis at birth usually happens in the delivery room or nursery. Doctors look at the shape and flexibility of each foot, then decide if a specialist should see your baby. The process is quick, hands-on, and gentle. If clubfoot is suspected, you will get a referral to a pediatric orthopedist so treatment can start early.
Right after birth, your baby gets a routine head-to-toe exam. For the feet, the doctor will:
This bedside check is painless and takes just a few minutes. If the foot moves easily into a normal position, it may be positional and not true clubfoot. If it stays stiff or springs back, clubfoot is more likely.
Specialists often use the Pirani score, a simple 0 to 6 scale that grades six signs of severity. Higher scores mean a stiffer foot and help guide how many casts might be needed. Ask your provider to share the score in plain terms so you know what to expect.
Helpful steps for parents:
Most babies do not need imaging right away. The exam alone is enough to start treatment. When needed, your team may use:
These tests confirm the diagnosis and help tailor the care plan, but they rarely delay casting. Your provider will explain each step and keep it simple. The goal is clear: start gentle correction early so your child has a strong, flexible foot.
Once clubfoot is on your radar, small details matter. You will not catch every sign at once, and that is okay. Look during diaper changes, bath time, and when your baby relaxes. What if your baby has mild symptoms? Pay attention anyway, then share what you see with your doctor.
Some signs are easy to spot. Others are subtle and appear during daily care.
How is this different from temporary positioning issues? Positional feet feel soft, move into a normal position, and often improve in a few days. True clubfoot stays stiff and does not correct with gentle stretching.
Helpful tip: take clear photos or short videos in the same positions each week. Add notes about stiffness, skin marks from the brace or cast, or feeding and sleep changes. These details help your doctor fine-tune care.
After diagnosis, you will get a referral to a pediatric orthopedist. Most teams start the Ponseti method in the first weeks.
Your role matters. Check toes for color and warmth after each cast, keep skin clean and dry, and report redness or swelling right away. Attend each follow-up. Small concerns today prevent bigger issues later.
Helpful resources: the Ponseti International website, your hospital’s orthopedic clinic, and parent support groups. Hearing from other families brings calm and practical tips.
You are not alone. With early care and steady follow-through, most kids walk, run, and play without limits.
Early answers calm fear. Most families first hear about clubfoot on the mid-pregnancy ultrasound, then confirm details after birth with a hands-on exam. From there, the path is clear. A trained pediatric orthopedist starts gentle serial casting, often follows with a small Achilles release, then protects the correction with bracing. Starting early, showing up for every visit, and keeping skin and toes checked lead to strong, flexible feet.
Use this guide to clubfoot diagnosis for new parents to plan next steps with confidence. Bring photos, ask about severity scores, and agree on a start date for casting. If imaging is suggested, learn what it adds and whether it changes the plan. Partner with your pediatrician and orthopedist, and keep notes between visits. Small details you share help the team tailor care.
Clubfoot is treatable, and informed parents lead to happy outcomes. Your child can walk, run, and play without limits. Thank you for reading and caring so deeply for your baby. If this guide helped, share your experience or questions in the comments to support the next family. For more parent-friendly insights on diagnosis, treatment, and daily care, follow along and stay connected.
Disclaimer:
OPSB products should be used under the guidance of a qualified healthcare professional. Individual results may vary. Please consult your pediatrician or orthopedic specialist for professional advice. This article is for informational purposes only and does not constitute medical advice. Always follow your doctor’s recommendations and instructions.
IAM-MM-047
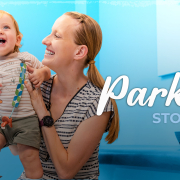
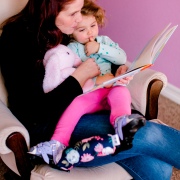
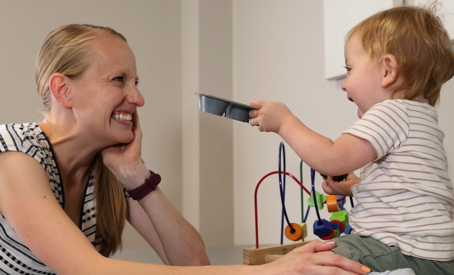
Every parent wants the best start for their child. When Brittany learned her son Parker would be born with clubfoot, worry was natural, but hope carried their family forward. Clubfoot comes with questions and adjustments, but it doesn’t have to hold a child back. Brittany’s story shows how early action, teamwork, and a positive outlook have helped Parker thrive.
Brittany’s pregnancy seemed to be going as planned until they reached the 20-week ultrasound. During this scan, doctors noticed something different about Parker’s feet. The doctor calmly explained that Parker had clubfoot, a condition where one or both feet turn inward at birth. Like many parents hearing this news, Brittany felt unease. No one wants to hear anything unexpected at what should be a happy milestone.
The 20-week ultrasound gave Brittany and her family a head start. Early detection meant they could prepare for treatment long before Parker arrived. Parents facing this news might worry, but catching clubfoot early gives families time to learn, gather support, and set up everything their baby will need. This clarity in the middle of surprise can make a big difference later on.
Any diagnosis related to your child brings strong emotions. Brittany remembers worry setting in as she wondered what her son’s future would hold. These are some of the initial questions and fears many parents might have:
As these thoughts came and went, Brittany realized she wasn’t alone. Many parents go through these same emotions and questions. It’s natural to feel nervous or scared.
With clubfoot, treatment often starts within the first weeks of a baby’s life. Doctors know that soft tissues and bones are most flexible in a newborn. Starting early uses this natural flexibility to gently guide the feet into a better position. The main goal: allow kids to walk, run, and live active lives.
Clubfoot treatment begins with serial casting which involves gently moving the foot into a better position and holding it there with a cast. This process is repeated over several weeks, slowly bringing the foot closer to a typical alignment.
After casting was complete, Parker moved into the bracing phase of treatment, often referred to as boots and bar (BnB). This phase of treatment helps maintain the progress made during casting and is vital for long-term success.
All of Parker’s bracing happened through their local clinical team at, OP Specialty Bracing. Brittany speaks warmly of the team, sharing how they worked side-by-side to help Parker succeed. The experience felt supportive, never rushed. The clinicians paid attention to Parker’s comfort and personalized every visit.
One challenge popped up early: Parker’s first braces rubbed on the tops of his feet and around his ankles. These pressure spots made things tricky and instead of dismissing it, the healthcare team listened to Brittany’s concerns. They added special pads to the braces and shared practical suggestions to help address the issue.

Tips for making braces more comfortable:
With each adjustment, Parker settled in and his comfort improved. For Brittany, knowing experts cared about the details gave her peace of mind.
No brace fits perfectly right away. The first days saw Parker fidget and squirm as he adjusted to the new sensation.
Comfort was the focus for Parker and his care team. Small adjustments made a big difference. Providers added soft padding, adjusted the straps, and even suggested ways to improve Parker’s routine at home. These little fixes helped Parker adapt faster, building trust between the family and their healthcare team.
Parker’s willingness to wear his braces without fuss showed everyone how quickly kids can adapt. Having a provider who not only cared for Parker but also educated Brittany about comfort and care set the stage for Parker’s treatment success.
For Parker, wearing braces quickly became second nature. Since treatment started early, bracing felt almost as normal as wearing a diaper or being tucked into bed. Parker’s easygoing attitude lightened the mood and reinforced the family’s positive approach. Instead of seeing the braces as a burden, Brittany and her family learned to see them as simple and familiar.
Bracing wasn’t just a necessity; it was hopeful. Every day Parker wore his braces, Brittany felt confident her son was heading toward a healthy, active future.
Raising a child with clubfoot means planning ahead. Simple days require more structure, and routines revolve around treatment. Brittany and her family have to consider doctor visits, bracing schedules, bedtime routines, and more. It’s a juggling act, but one they handle with care and love.
Ways life requires more planning with clubfoot:
Every new challenge brings a learning moment. The family’s willingness to keep learning and growing together helped them thrive, even if life moved at a different pace.
At first, Brittany worried how people would view Parker’s bracing. Would there be misunderstandings or negative comments? Over time, she found a sense of pride and hope in the process.
“For us, his bracing is a really hopeful thing. I don’t want people to ever talk negatively about his bracing because for us that’s what is setting him up for a successful future.”
Brittany encourages others to see bracing as a smart, caring choice, not a setback. Shifting the conversation to focus on long-term benefits builds resilience in both parents and children.
Hearing the word clubfoot brought fear, but Brittany learned this fear can fade sooner than expected. After treatment begins, routines start to feel normal. What once seemed overwhelming shrinks as families gain comfort and skill.
Life quickly starts to look and feel like it should, with laughter filling the room and children hitting milestones. Clubfoot becomes just a part of everyday life, not the definition of it.
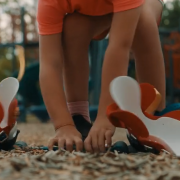
Today, Parker is as curious and active as any toddler. He picks up new skills, explores his world, and keeps his parents on their toes by tossing toys to the floor, just like other kid his age. Brittany finds comfort and happiness in these little, everyday moments.
Each time Parker crawls, stands, or makes a mess, it’s a small victory that proves more meaningful to Brittany because clubfoot isn’t holding him back. Living with clubfoot hasn’t stopped Parker from being a happy, healthy child. The bracing routine that once felt daunting has become part of their family’s daily lives.
If you’re new to the clubfoot journey, trust that support, care, and early treatment can help your child thrive. Brittany’s story is a reminder that with the right treatment and a positive attitude, life can be filled with hope.
For parents at the start of their own journey, remember:
No parent wishes for a medical diagnosis, but with clubfoot, early detection and the right support can transform fear into confidence. Brittany’s experience with Parker shows that, while challenges and adjustments are real, a hopeful attitude and support system make all the difference.
If you’re facing a clubfoot diagnosis, or guiding a loved one through it, remember that treatment offers more than correction, it brings the promise of a bright, active future. Every day, kids like Parker prove that with the right tools, a little extra planning, and unwavering support, obstacles become stepping stones toward joyful, healthy lives.
Disclaimer:
OPSB products and products distributed by OrthoPediatrics Corp. should be used under the guidance of qualified healthcare professional. Individual results may vary. Please consult your pediatrician or orthopedic specialist for professional advice, including intended use, warnings, precautions, side effects and contraindications. This video is for informational purposes only and does not constitute medical advice. Always follow your doctor’s recommendations and instructions.
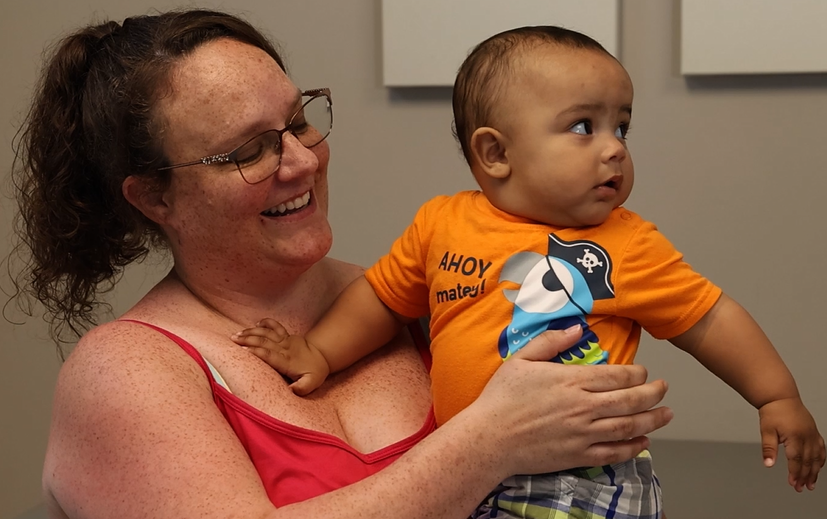
Finding out your baby may need special care is never easy. For Katie and Paul, the news that their son Julian had unilateral clubfoot was a surprise, one that brought emotional ups and downs. Their story shines a light on the day-to-day realities of clubfoot treatment, the support available, and why it’s okay to take things one step at a time.
Unilateral clubfoot is a condition where one foot, in this case Julian’s left, turns inward at birth. Clubfoot can be seen during prenatal scans, which is when Julian’s parents first learned about his condition. That revelation changed everything. As Katie described, “nobody wants to hear anything is wrong with their baby.” The words sting, and the first spark of worry often grows into a wave of emotions.
Still, Julian kept growing just like any other baby. He hit typical milestones and brought the same joy as any newborn. His clubfoot diagnosis didn’t put his development on pause. It meant the family took extra steps each day, but Julian’s bright spirit never dimmed.
The early days were a mix of medical appointments and learning new routines. Emotions flipped from concern to hope, sometimes in the same hour. Trust the process, Katie and Paul repeated, holding onto every small sign of progress. Parents facing a new clubfoot diagnosis might feel:
Julian’s story is proof that even unexpected news can lead to new sources of strength and love.
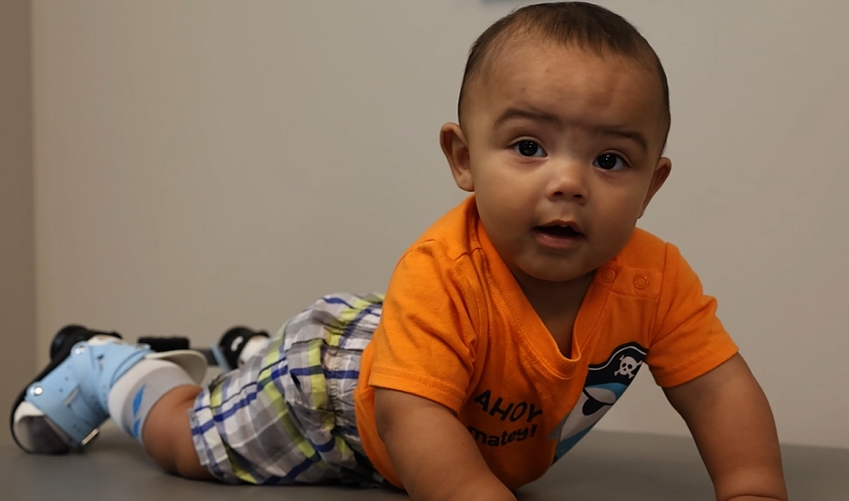
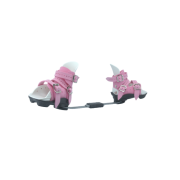
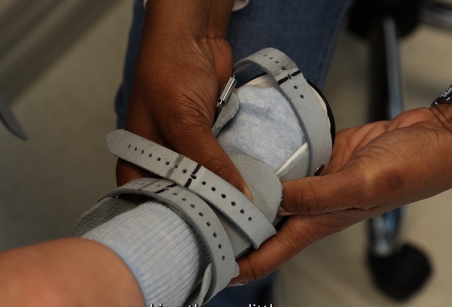
Julian’s clubfoot journey included the well-known “boots and bar” treatment, a common, effective approach for supporting babies through clubfoot correction. The boots connect to each other with a bar, holding both feet in the right position so the affected foot can stretch and grow properly.
At first, the boots were a big change. Babies instinctively move their feet and kick around. When Julian first tried his boots, he seemed surprised by the way his feet couldn’t move independently. For a few days, he had to learn new ways to stretch, move, and get comfortable.
But adapting came quicker than expected. It only took about a week for Julian to get used to the boots, his parents shared. After that first stretch, the boots and bar stopped feeling like obstacles. They became just a normal part of Julian’s routine.
Katie and Paul used some creative tricks to help Julian feel at ease:
Tips for Helping Babies Adjust to Clubfoot Boots:

Another standout was the support from the staff at their OPSB clinic. Every visit, they felt cared for. Any questions we had, we could ask, and staff always explained things clearly. When Julian needed new boots fitted, the orthotist used a smart, simple trick:
After adjusting the new boots, they marked the right setting with a pin, so Katie and Paul didn’t have to count small dots each time. This little touch made it easy to strap Julian in correctly at home, even when they were in a rush or feeling tired.
Sometimes, the smallest details—like a pin mark on a boot—can take a huge weight off a parent’s shoulders.
The path to correction wasn’t easy for Julian’s family. There were doubts, long nights, and those moments when Katie and Paul asked themselves if they were doing it all right. “It was definitely an emotional ride… it was a long process but it’s definitely working out.”
Sticking with the wear schedule, learning to trust new routines, and remembering to look for progress instead of perfection shaped their experience. Even on tough days, they saw how small adjustments could bring big relief:
Trusting the process was their family mantra, but it’s really about trusting both themselves and the team supporting them.
“The hardest parts pass, and one day you wake up and realize that what once seemed impossible is now just another part of the family routine.”
Remember, every journey with clubfoot will look a little different, but the mix of emotions—worry, hope, confusion, pride—will be familiar to many.
Julian’s parents learned a lot by going through treatment day by day. Their advice is practical, and it comes from real experience.
What helped Julian, and could help you:
Taking the clubfoot journey as a family is challenging, but each act of patience pays off in your child’s new skills, strength, and smiles.
There are many organizations and groups dedicated to clubfoot support and information. While no specific resources are linked here, asking your doctor or care clinic for suggestions can be a good place to start.
At the heart of Julian’s story is the message that with care, community, and creative problem-solving, children with clubfoot can thrive. The diagnosis is tough, but treatment is proof that things really can turn out well. Simple innovations—like pin-marked boots and compassionate doctors—ease the journey.
For any family hearing the words “clubfoot” for the first time, know that you’re not alone. The process is full of emotions, but there are brighter days ahead. As Julian grows, so does the confidence his parents have in themselves and in their community. Their story is a reminder that what feels overwhelming today often becomes tomorrow’s new normal.
If you’d like to watch Julian’s story told by his parents, you can find the video near the top of this page for more insight and encouragement.
Every small victory matters. And every family, like Julian’s, shows there’s hope in every step.