Colt’s Story with GiggleFIT Play Gym
Hearing that your child needs an amputation can feel overwhelming. This guide was created with families in mind, to help you navigate your child’s amputation with greater confidence and understanding. It explains:
Above all, this is a reminder that amputation is only one part of your child’s journey – not the end of their story. With time, care, and the support of family and care teams, your child will go on to live an active, confident and independent life.
Amputation refers to the surgical removal of all or part of a limb (i.e. an arm or leg). Doctors may recommend an amputation when it is the safest or most effective way to treat a medical condition, injury, or infection. Some children may also be born with a limb difference or missing bones that make a limb hard to use. The goal is to support the child’s overall health, function, mobility, and development.
Children are not just small adults. Their bones, muscles, and joints are still growing, so doctors have to think ahead. Because the reason for needing an amputation as a child may be unique, due to an illness or congenital limb difference, doctors sometimes use different amputation surgeries and strategies in children that allow for better healing and prosthesis fit for a growing child. They are adept at planning ahead for growth and a child’s changing needs.
In some cases, you may not be able to prepare for your child’s amputation surgery. However, in many cases the decision to pursue amputation will come after many visits with your trusted medical team. During your time working with the medical team, the surgeon will get to know your child and family, understand your goals, and discuss all available treatment options and anticipated outcomes (both surgical and non-surgical). During these visits, you may also meet other team members who will help with your child’s rehabilitation, such as:
Be sure to take the time to ask your doctor questions, and bring up any concerns you have about your child’s rehabilitation after amputation. If you are unable to meet with some of the above providers during your doctor’s visits, ask your physician what resources they have, or if they work closely with a care team to be able to speak to a prosthetist, PMR doctor, and therapists.
Your doctor should be able to provide specific details about your child’s surgery and recovery.
Please see this article for more information on questions to ask your child’s providers.
Children often cope better when they know what to expect. Your words don’t have to be perfect – simple and honest is best.
For younger children, using dolls, stuffed animals, or simple drawings to show or demonstrate what is happening can help your child cope and prepare. A child life specialist or social worker with your medical team may be able to help provide age-appropriate support to help your child best prepare emotionally for this big change.
For school-age children and teens, offering a little more detail can be helpful. Encourage them to ask questions and use clear, direct words like “amputation” and “surgery”. It can also be reassuring to talk about activities they can return to doing once they’ve healed, what the healing process can look like, and introduce them to different members of the team so they can start to build relationships with their care team.
If your hospital has child life specialists, consider asking them to meet with your child. They often have books, pictures, dolls, and activities to help explain medical care in a way children can better understand to better prepare your child emotionally for medical procedures.
Your physician should discuss all of the details of your child’s surgery and recovery. It’s important to ask the doctors any questions you may have about the process, including:
While in the hospital, your child may see a physical or occupational therapy team to make sure they are safe and comfortable with mobility given their new amputation. This may include learning to use a walker, crutches, or wheelchair to safely move after their surgery. Preventing falls after surgery is very important to ensure your child’s wound heals properly without further injury.
Your child may go home with special bandaging, covers/shrinkers, or protectors on their limb. Be sure the medical team provides you with instructions on when to wear these covers, how often they should be changed, and gives you the opportunity to practice care before you go home from the hospital.
The medical team will make sure your family is comfortable with all of your child’s surgery after-care and the follow-up plan.
Some pain after surgery is normal, but it should be controlled. Call your child’s care team or seek medical care right away if you notice:
Trust your gut. If something doesn’t feel right, it is always okay to call and ask for help.
Once you go home, the focus will be on healing and settling back into daily life. The first few weeks are usually centered on caring for the incision, gentle movement, and slowly rebuilding strength. Be sure to follow the instructions from your doctor on any movement, incision care, and therapies.
Therapy often starts in the hospital and continues after discharge, either through outpatient visits or in your home. Progress may happen in small but important steps – it is important to follow the instructions of your therapist so your child can progress safely through their rehabilitation to prevent injury and continue their safe healing journey.
The part of the arm or leg that remains after surgery is often called the residual limb. Taking good care of this area each day helps lower the risk of infection and skin problems. Here are some general tips for residual limb care, however always follow your surgeon’s instructions if they differ:
Some children may notice sensations that feel like they are coming from the part of the arm or leg that is missing. This is called phantom limb sensation. Children may describe feelings such as tingling, warmth, itching, cramping, or movement in a hand or foot that is no longer there. This occurs less in children with amputations, but it can still happen.
Sometimes these sensations are painful. This is known as phantom limb pain. It is very real and can be upsetting, especially if a child does not understand why it is happening. Depending on your child’s phantom limb sensation or pain, your care team may suggest interventions such as gentle massage, desensitization therapies, mirror therapy, or other treatments.
Keeping a simple record of when phantom pain happens and what helps can be very useful. Sharing this information with your child’s care team allows them to better support your child.
Physical and occupational therapy are often where many children begin to build strength, confidence, and independence. This can begin even before your child receives a prosthesis.
In physical therapy (PT), your child may:
In occupational therapy (OT), your child may:
Many parents find it helpful to watch therapy sessions. This can make it easier to support exercises at home. Rather than trying to remember everything, ask the therapists to show you two or three key activities to practice between visits or provide a print out of exercises you can do at home. Your therapy team will work closely with your prosthetist team to ensure your child is successful with their rehabilitation and recovery goals.
Once your child’s limb has healed and your physician has deemed it safe for them to wear a prosthesis, you will meet with a prosthetist team to begin the process of being measured for a prosthesis. This may take a number of visits, including evaluation appointments, casting sessions, and practice fittings before the prosthesis is ready to come home with your child. Your prosthetist will work with your family, the physician team, and the therapy team to ensure the prosthesis is appropriate for your child, and can help your child regain functional mobility and meet their goals. They may even join you at sessions of physical therapy to help adjust and optimize the prosthesis.
Your child’s prosthetic goals may change over time, especially as their limb changes and heals after surgery, and as they get stronger. Their activities and interests may change over time as they grow. A pediatric prosthetist will ensure that your child’s prosthesis can adapt and change to their growing body and changing needs. Your prosthetist will also ensure that the prosthesis is still fitting your child as they grow, and may replace parts or measure for a new prosthesis as your child grows and changes. It is important to regularly follow-up with your child’s prosthetist team so they can be successful and safe with their prosthesis.
Disclaimer:
OPSB products and products distributed by OrthoPediatrics Corp. should be used under the guidance of qualified healthcare professional. Individual results may vary. Please consult your pediatrician or orthopedic specialist for professional advice, including intended use, warnings, precautions, side effects and contraindications. This article is for informational purposes only and does not constitute medical advice. Always follow your doctor’s recommendations and instructions.
MAM-MM-177

A prosthetist is a certified healthcare professional who designs and fits artificial limbs and devices for those with amputation or limb difference. Prosthetists collaborate with the medical team to create treatment plans, design devices, and care for those using a prosthesis to help patients achieve their functional and mobility goals. A prosthetist goes through 3-4 years of training after college to become a certified clinician.
This blog will walk you through a prosthetist’s role in your child’s care, why a pediatric-trained prosthetist matters, and how to choose the right provider for your child.
In simple terms, your prosthetist:
The prosthetist is not someone your child will see just once. Over many years, your child will need adjustments to their prosthesis, different componentry, and new devices as they grow, change, and explore new activities. A strong prosthetist-patient relationship is a long-term partnership. The prosthetist works with your child’s family, care team, and school to be successful with their prosthesis.
As your child grows and changes, so do their prosthetic needs. Socket fit can go from “perfect” to “too tight” in just a few weeks during a growth spurt. Alignment that once worked for a toddler’s short, quick steps may no longer work for a grade-schooler running around at recess. A teen who wants to sprint, dance, or play sports will need different features than a younger child who is learning to balance. Each stage brings new physical demands and new emotional needs.
A pediatric prosthetist has the tools, training, and mindset to keep up with this constant change as your child grows. Pediatric-trained prosthetists use their expertise to support health and independence through prosthetic care as your child grows. They will be able to connect you with resources, such as peer supports and other local medical providers, to make sure your child is successful with their prosthesis.
Pediatric-trained prosthetists are specifically aware of pediatric conditions and anatomy, and how these differ from adult presentations. They plan socket shapes and padding to protect sensitive areas, check alignment often to avoid strain on your child’s hips, knees, and back, and plan for anticipated growth in all parts of the prosthesis. An ill-fitting prosthesis can put stress on a joint, limit motion in a growing limb, and cause pain that your child may not know how to explain. Over time, this can affect posture, walking pattern, and even spine health.
Kids often play hard and forget to slow down. This can lead to common skin issues such as:
A pediatric-trained prosthetist watches for these warning signs and educates families on what to watch for. They check your child’s skin during visits and choose breathable liners and materials that better handle sweat. During growth spurts, they may plan more frequent checkups since fit can quickly change. Most importantly, they teach families to be the best advocate for their child, knowing what to look out for, so families are empowered and knowledgeable about their child’s prosthesis, care, and follow-up.
The emotional side of prosthetic care is just as important as the physical side. Kids with limb differences may feel different from their peers, shy about showing their device, and frustrated when something is hard. A pediatric-trained prosthetist understands these challenges and aims to make the prosthetic process fun by using kid-friendly language and inviting your child to make choices. The prosthetist can also help prepare your child for conversations with classmates about their prosthesis and will collaborate with your child’s school team so they can be successful and well-adapted in their school environment. When your child feels proud of their device, they are more likely to wear it, use it well, and join in activities.
Children use their bodies differently at every age. A toddler tumbles and crawls. A grade-schooler runs, jumps, and plays tag. A teen may be focused on sports, work, or hobbies.
A pediatric-trained prosthetist considers the needs of each age group:
A child who loves soccer may need a foot that helps with quick starts and stops. A teen who plays violin may need an upper-limb device that holds the instrument in a specific way. A pediatric-trained prosthetist matches components to your child’s life rather than a standard activity level label.
Knowing what qualities to look for in your prosthetist will help you be a strong advocate for your child. It is important to inquire about training, certifications, and true pediatric experience. After receiving a master’s degree, prosthetists complete residency and take exams to become board certified. Some prosthetists choose clinics that focus on kids or complete extra pediatric courses. When choosing a pediatric-trained prosthetist, examples of helpful questions include:
Your prosthetist should explain choices in plain language and ask what matters most to your family. You should never feel rushed, ignored, or talked down to. Keep in mind that pediatric prosthetic care is a long-term process, not a one-time event. It is important to ask about frequency of follow up appointments, what will happen when your child grows, and what to do if issues arise. Having confidence in your child’s prosthetist team will help facilitate open communication so your child can be successful with their prosthetic care.
With the right team around you, your child can move, play, and grow with confidence. A helpful next step is to write down your top questions, talk with your child’s doctor, and schedule a visit to meet a pediatric-trained prosthetist.
Disclaimer:
OPSB products and products distributed by OrthoPediatrics Corp. should be used under the guidance of qualified healthcare professional. Individual results may vary. Please consult your pediatrician or orthopedic specialist for professional advice, including intended use, warnings, precautions, side effects and contraindications. This article is for informational purposes only and does not constitute medical advice. Always follow your doctor’s recommendations and instructions.
MAM-MM-175

A Parent’s Guide to Understanding How Prosthetic Needs Change as Children Grow
Children change rapidly as they grow, and when a child uses a prosthesis, those developmental shifts influence far more than just clothing size or shoe fit. Their limb length, strength, coordination, and daily activities evolve throughout childhood, which means their prosthetic needs evolve too. Understanding how prosthesis design adapts to each stage of growth can help parents feel more prepared and confident as their child progresses through important milestones.
Childhood growth is dynamic. Unlike adults, children frequently outgrow their sockets, develop new motor skills, explore new physical challenges, and shift their interests as they discover what they enjoy. A prosthesis that fits well and supports these changes can encourage healthy movement, confidence, and participation in daily life. As children grow, prosthetic design needs to adjust—sometimes subtly, sometimes significantly—to match their development and support their abilities.
During the earliest stage of life, children are learning how their bodies move and beginning to explore the world around them. Prostheses introduced at this age are focused on helping them become familiar with wearing a device while encouraging early, symmetrical movement, such as crawling, pulling up to stand, and cruising. Comfort and flexibility are the priorities, allowing children to progress through these motor milestones. Devices for this age are typically lightweight, more flexible, and simple so they don’t interfere with crawling, sitting, or early standing. The goal is gentle exposure that supports natural development, and helps the family and child learn the basics of using a prosthesis.
As toddlers grow, they become busy explorers who climb, run, and test the limits of their mobility. Their prosthesis must be durable enough to withstand daily bumps while still being light and comfortable enough to encourage steady walking. Because growth is rapid, families can expect more frequent adjustments or new sockets during this period. A well‑designed prosthesis during the toddler years supports balance, stability, and safe exploration, making it easier for children to participate in the kinds of active play that drive their development.
Children at this age begin building more independence and developing stronger coordination. They are also becoming more aware of their bodies and how they compare to peers. Prosthetic design during this stage focuses on supporting more complex movements like running, jumping, and participating in early sports or recess activities. Many children also enjoy choosing colors or patterns for their device, which gives them a sense of ownership and pride. Prostheses may become more functional in this stage, with components designed to match their growing confidence and mobility.
Once children reach elementary school, their world expands. They may join sports teams, learn to bike confidently, and take on more physically demanding hobbies. Prosthetic design during this stage often becomes more activity‑focused. Components may be more advanced to support energetic, coordinated movement, and children may use sports or activity-specific devices depending on their interests. Regular check‑ins with a prosthetist become especially important because alignment and fit can shift rapidly as children enter their large growth spurts into adolescence.
The teenage years bring rapid growth and emotional change. Growth spurts can dramatically alter socket fit in a short period, so more frequent prosthetic appointments are common. Teens may also have more specific preferences related to appearance, technology, or function. Prostheses at this age may incorporate more advanced mechanical or myoelectric components that support the complexity of teenage life, including sports, part‑time jobs, driving, preparing for advanced education, and increased independence. Comfort, performance, and independence become major priorities as teens learn to navigate their evolving bodies and take more ownership of their prosthetic care and independence.
While every child’s growth pattern is unique, infants and toddlers often need new sockets every 8-12 months, younger school‑age children may need new devices annually, and older children and teens may go 12–18 months between major replacements. Even so, small adjustments—such as padding changes, alignment tweaks, or minor repairs—may be needed at any time as children grow and increase their activity levels. Even if adjustments are not needed, it’s important to follow-up with your prosthetist for routine maintenance and safety inspections.
Parents often notice signs that a prosthesis is no longer fitting well before a child does. Redness that doesn’t fade quickly, new pain, changes in walking pattern or activity involvement, skin irritation, or sudden looseness or tightness are all cues that the device may need attention. Trusting your instincts and reaching out promptly to your prosthetic team helps keep your child comfortable and safe during periods of rapid growth.
As prosthetic needs change, emotions and confidence levels can shift too. Encouraging open conversations about comfort, preferences, and frustrations helps children feel supported. Giving them a voice in choices—like design, color, or activity‑specific devices—can foster independence and self‑expression. Staying connected to your prosthetic team and regularly discussing your child’s goals ensures that each new device continues to support their physical and emotional development.
Matching prosthetic design to growth and development is an ongoing partnership with your child, family, and their entire care team. Each stage of childhood brings new challenges and new strengths, and a well‑designed prosthesis can support every step, leap, and milestone along the way. With thoughtful adjustments and a collaborative care approach, children can move confidently through their world and into each new stage of life.
Disclaimer:
OPSB products and products distributed by OrthoPediatrics Corp. should be used under the guidance of qualified healthcare professional. Individual results may vary. Please consult your pediatrician or orthopedic specialist for professional advice, including intended use, warnings, precautions, side effects and contraindications. This article is for informational purposes only and does not constitute medical advice. Always follow your doctor’s recommendations and instructions.
MAM-MM-176
A Simple, Supportive Guide for Families on the Move
Moving is a big transition for any family. When your child uses a prosthesis, it can feel even more stressful to figure out how to continue their care in a new place. The good news? With a little planning, your child’s prosthetic needs can stay on track wherever you go.
This guide gives you the key steps—clear, simple, and easy to follow.
Before you move, reach out to the prosthetist, surgeon, and therapists who already know your child.
Ask for:
Doing this early helps your new team hit the ground running.
Your current care team may also have recommendations for providers near your new home. The field of pediatric specialists that work with children with limb loss and limb difference is small. Your current providers may have suggestions or a connection where you are moving, so don’t hesitate to ask!
Not every clinic specializes in children. Look for a provider who understands growth‑related changes and pediatric activity needs.
Helpful questions when calling new clinics:
Location matters too—kids often need more frequent adjustments than adults. Be sure that where you choose your providers can be easily accessed by your family for your child’s frequent visit needs.
To prevent gaps in care:
Schedule a visit with your new care team shortly after your move. This will help you and your child get introduced to the new care team and build the relationship with your child for their care. It’s important you create a follow-up plan and know how to contact your new clinical care team in case your child needs adjustments or follow-up appointments. Meeting your new care team when it’s not urgent can help transition care smoothly.
Insurance can change when you move, especially across state lines.
Consider:
Prosthetic offices are typically very helpful with authorization paperwork. Having a case manager or special contact at the insurance company can help with insurance transitions and ensure your new plan will cover your child’s prosthesis.
New cities and new clinicians or doctors can feel intimidating.
Try:
Small reassurances go a long way.
Once you arrive:
Good communication makes the return to school smoother. A Limb Difference Clinic or Rehabilitation (PM&R) Physician may help with these transitions and establishing resources for support at your child’s school.
Be sure to connect your new care team to your child’s old providers. This can help facilitate communication and ease the transition between teams so your child has the best supports during this transition.
Let the new team know:
This helps create a prosthetic and care plan that fits not just their body, but their personality.
Moving doesn’t erase your child’s progress—it simply adds a new team to support their journey. With a bit of preparation, your child’s prosthetic care can continue smoothly, safely, and confidently in your new home.
Disclaimer:
OPSB products and products distributed by OrthoPediatrics Corp. should be used under the guidance of qualified healthcare professional. Individual results may vary. Please consult your pediatrician or orthopedic specialist for professional advice, including intended use, warnings, precautions, side effects and contraindications. This article is for informational purposes only and does not constitute medical advice. Always follow your doctor’s recommendations and instructions.
MAM-MM-174

Hearing that your child needs halo gravity traction can stop you in your tracks. The name sounds intense, and the equipment can look scary at first. Most parents have the same questions right away: Why does my child need this, what will it feel like, and how do we get through the hospital stay?
Halo gravity traction is a way for a spine team to slowly and gently improve a severe spinal curve. It’s most often used for kids and teens with scoliosis or kyphosis, especially when the curve is large or stiff. It can also help in some complex spine conditions where breathing or balance is affected.
This guide explains what halo gravity traction is, what daily life looks like in the hospital, what side effects to watch for, and what to ask your child’s care team so you can feel steady and prepared.
Halo gravity traction is a treatment that uses a halo, a ring, attached to the skull with small pins. Those pins sit in the outer layer of the skull bone. The halo then connects to a traction system that creates a gentle upward pull. That pull can come from a pulley and weights, or a traction frame, depending on the hospital and your child’s mobility plan.
It may help to picture it like slowly straightening a bent young tree with soft ties instead of forcing it upright all at once. The goal is steady change over time, not a big correction in a single day.
The main purpose is to gradually stretch the spine and the soft tissues around it, including muscles and ligaments. This can:
Doctors most often recommend halo gravity traction for severe scoliosis or kyphosis, very stiff curves that don’t move much on bending X-rays, spine deformities that may affect breathing, or complex conditions where a careful, staged approach is safest.
For some kids, the biggest risk in spine surgery is not the rods or the length of the operation. It’s the stress that a sudden correction can place on the spinal cord, nerves, and lungs.
Halo gravity traction can lower that stress by doing part of the correction slowly, before the operating room. As the curve eases little by little, the surgeon may not need to apply as much force during surgery. That matters because less force can mean a lower chance of nerve irritation or injury.
Traction may also help with balance and positioning. A spine that is less twisted and less stiff can be easier to align during fusion or other procedures. Some kids also breathe a bit easier as the chest and spine position improves, though results vary and depend on the child’s condition.
A key point for parents: traction is not about rushing to create a perfect spine. It’s about making the next step safer and more controlled.
A spine team decides on halo gravity traction based on imaging, physical exam, and your child’s overall health. It tends to be most helpful when a child has a very large curve, a rigid curve with poor flexibility, or signs that the curve is affecting breathing or stamina.
If traction is recommended, it’s because the team believes the benefits outweigh the risks for your child’s exact situation. Don’t be afraid to ask what other options were considered, and why traction fits your child best.
In most cases, halo gravity traction usually means an inpatient hospital stay. Many families find that the first few days feel like the steepest part of the learning curve. After that, the routine becomes more predictable.
Your child may have pre-hospital testing, such as X-rays and other imaging, lab work, and sometimes breathing tests if lung function is a concern. The halo ring is then placed, often in the operating room with anesthesia or heavy sedation. After placement, traction starts at a low weight. The team slowly increases weight over time, often daily, while watching comfort, nerve function, and pin sites.
Traction often lasts weeks, but the exact length varies. Some kids use traction mainly in bed with a frame. Others can get up, walk, and do therapy while still in traction, using a rolling traction walker or a wheelchair plan.
In the room, you’ll likely see ropes, pulleys, and weight plates (or a built-in traction setup), plus safety features to keep the system stable. It can look like a lot, but nurses and therapists will teach you what each part does, which parts you can adjust, as well as what you should never adjust on your own.
On halo placement day, your child will usually go to the operating room. The surgeon places the halo ring and inserts several small pins. Parents often worry about the word “pins,” but they are designed for traction, and the team checks them carefully.
After placement, it’s normal for your child to feel sore. Some kids describe a tight feeling, a headache, or pressure at first. The team will treat pain early, then adjust as your child settles in.
Pin site care is a big part of preventing infection. Nurses typically clean around each pin site and check the skin often. Your job is not to guess the “right” technique. Your job is to watch and speak up if something looks off, and to ask the team to show you what normal healing looks like.
Ask your care team what signs matter most at your hospital. In general, warning signs may include redness that spreads, swelling, warmth, drainage, a bad smell, fever, or pain that’s getting worse instead of better.
Once the system is set up and your child’s weight increases slowly, daily life becomes a mix of therapy, rest, and finding ways to stay connected to normal routines.
Mobility depends on the traction type and your child’s condition. Some kids can stand and walk while in traction, usually with a special walker or frame. Others need a wheelchair for longer trips in the hospital. Physical therapy often focuses on safe movement, leg strength, and endurance. Occupational therapy may help with daily tasks like getting dressed or adjusting to new limits.
Sleep can be tricky at first. The position may feel unfamiliar, and the halo ring can make turning harder. Utilizing extra pillows, careful support under the knees, and a calm bedtime routine can help. The nurses can also suggest safe positions based on your child’s setup.
Bathing and hair washing often need adaptations. Some hospitals use no-rinse shampoo caps, basin washes, or assisted shower plans. Bathroom needs are planned around safety and the traction system. The staff has done this many times, and it’s okay to ask for privacy and a step-by-step explanation.
School doesn’t have to stop. Many children’s hospitals have hospital teachers or school services. Child life specialists can also help your child cope, stay busy, and feel more in control.
Halo gravity traction is closely monitored. The team doesn’t just add weight and walk away. They check comfort, strength, sensation, and skin. Your child will also have regular check-ins with the surgeon and therapists, and may have repeat imaging to track progress.
Still, side effects can happen. Most are common and manageable. Some need quick attention. Parents do best when they treat changes like useful information, not a reason to panic.
Pain control usually uses a mix of approaches. That may include scheduled pain medicine early on, then as-needed medicine later, plus ice packs, gentle stretching, and therapy. Emotional comfort matters too. Kids can feel trapped, bored, or embarrassed. A steady routine, honest answers, and small choices (what to watch, who to call, when to rest) can reduce stress.
In the first days, headaches are common. The halo changes how forces move through the head and neck, and the pins can create pressure. Neck and shoulder soreness can also happen as muscles adapt to a new alignment.
Some kids get nausea, especially if in pain or if they feel anxious. Muscle soreness can show up in the back, hips, or legs because traction slowly changes posture.
Most of the time, the care team responds by adjusting the traction plan, treating symptoms, and pacing activity. Sometimes a small change, like slowing a weight increase or changing a pillow setup, makes a big difference.
When your child is in traction, you’re part of the care team. You’ll notice patterns in pain, mood, sleep, and appetite. You’ll also be the one translating hospital life into something your child can handle.
Advocacy can be calm and practical. Keep a short list of questions on your phone. Write down the names of key team members. If something doesn’t make sense, ask for plain language. If two people give different answers, ask them to confirm the plan together.
It also helps to talk early about what happens after traction. For many kids, the next step is spine surgery, often spinal fusion. For others, the plan may include bracing or a different staged approach. Rehab and follow-up are part of the path either way.
A few focused questions can clear up a lot of worry:
Progress is often tracked with repeat X-rays, height changes, posture and balance, comfort level, and in some cases breathing measures. Some days look quiet, but small gains add up over weeks.
Packing for traction is less about “cute hospital outfits” and more about comfort and access. Clothing should be easy to put on without pulling over the head.
A practical packing list:
Family logistics matter too. Ask about hospital school services, visiting rules, meal support, and parking passes. If you have other kids at home, line up a plan early for routines, rides, and check-ins. The steadier home feels, the safer your child will feel in the hospital.
Halo gravity traction is a slow, controlled way to help straighten a severe spinal curve and prepare the body for the safest next step. It looks like a lot at first, but it’s closely monitored, adjusted carefully, and designed to protect your child’s nerves and comfort. Most kids adapt over time, especially when pain is treated early and routines stay steady.
Your role matters. Watch for changes, ask clear questions, and keep the care team in the loop. If you’re unsure about anything, your child’s spine team is the best source of guidance for your child’s diagnosis, hospital setup, and halo gravity traction plan.
Disclaimer:
OPSB products should be used under the guidance of a qualified healthcare professional. Individual results may vary. Please consult your pediatrician or orthopedic specialist for professional advice. This article is for informational purposes only and does not constitute medical advice. Always follow your doctor’s recommendations and instructions.
MAM-MM-169

Sophia still remembers the day her scoliosis journey began because it wasn’t in a doctor’s office, but at school.
It was a routine grade-school scoliosis screening with the school nurse. When she returned to class, she realized she was the only student holding a letter recommending a follow-up visit with her pediatrician. At the time, she didn’t fully understand what it meant. She just knew something was different.

Her pediatrician confirmed the nurse’s observations and referred her to Texas Scottish Rite Hospital. Even then, the diagnosis hadn’t fully sunk in. It wasn’t until she met with her orthotist for her evaluation that reality hit—she was going to wear a brace.
Looking back now, Sophia remembers feeling confused more than anything else. She didn’t yet understand scoliosis, bracing, or how much this experience would shape her future.
Sophia was prescribed a nighttime scoliosis brace, meaning she only wore her brace while sleeping at home. While any type of scoliosis bracing can be challenging, nighttime wear allowed her to attend school and participate in extracurricular activities without her brace during the day which made a big emotional difference as a teen.
Once she adjusted to sleeping in her brace, it became routine. Eventually it even felt strange not to sleep in it.
She also learned early on that scoliosis treatment isn’t one-size-fits-all. Many factors determine whether a patient wears a brace full time or only at night, and for the right presentation, nighttime bracing can reduce the emotional burden that sometimes comes with daytime wear.
Sophia credits her success in bracing to the people around her.
Her first line of support was her multidisciplinary care team, her pediatrician, orthopedist, radiologist, and orthotist who were all working together. To Sophia, great clinical care wasn’t about a single provider; it was about collaboration.
Her family played an equally critical role. They helped ensure she met her wear time, donned her brace correctly, and never missed an appointment.
And then there was her best friend who was diagnosed with scoliosis shortly after Sophia and prescribed a full-time brace. Having someone her own age who truly understood made all the difference. They joked that when they wore their braces, they had “abs of plastic.” That shared humor and relatability helped normalize what could have felt isolating.
Although Sophia’s story begins with scoliosis, her path into orthotics wasn’t immediate. She always knew she wanted to work with people and with her hands, and she explored several career paths before discovering orthotics and prosthetics.
One person made a lasting impression: her own orthotist, Cara. She took the time to explain every step, set clear expectations, and ensure Sophia felt comfortable both physically and emotionally. That care planted a seed.
Sophia remembers thinking, I want to pass forward the care that was given to me.
The moment everything clicked came during her first day shadowing at an O&P clinic as an undergraduate student. She observed a bilateral AFO fitting for a toddler with delayed motor milestones. By the end of the appointment, the child stood independently and even attempted a step. The parents were overjoyed.
That was it. Sophia knew: this was the work she was meant to do.
During O&P school, Sophia knew pediatrics was where she belonged. When she visited Boston O&P, now OP Specialty Bracing, she knew it was where she wanted to complete her residency.
Her New England residency included rotations across multiple Boston Children’s Hospital locations, exposing her to a wide range of diagnoses and pediatric specialties. She learned from dedicated clinicians and, after certification, stayed on as part of the team.
Sophia enjoys orthotics and prosthetics serve patients of all ages, diagnoses, and goals. Whether a child needs a scoliosis brace, AFOs, or a cranial helmet, the purpose is always the same: improving quality of life for that child.
Orthotics, she says, is the perfect blend of healthcare, art, and engineering and she feels honored to be part of the profession.
Today, Sophia brings both clinical expertise and personal understanding to every patient interaction.
As a former scoliosis patient, the phrase “treat others as you would want to be treated” carries real meaning. She strives to provide the highest level of care not just because she’s been there but because every child deserves it.
When working with teens who may be struggling with bracing, Sophia focuses on listening and education. She helps families feel informed and supported throughout treatment. Often, it’s the parents who express the most gratitude when Sophia chooses to share her own story who are reassured by hearing from someone who truly understands the journey.
Sophia’s story is a reminder that pediatric orthotic care is about more than devices and diagnoses. It’s about empathy, trust, teamwork, and meeting kids where they are.
What began as a confusing school screening became a calling; one that now allows Sophia to support families walking the same path she once did herself.
Disclaimer:
OPSB products and products distributed by OrthoPediatrics Corp. and its subsidiaries should be used under the guidance of a qualified healthcare professional. Please consult your pediatrician or orthopedic specialist for professional advice. This content is for informational purposes only and does not constitute medical advice. Always follow your doctor’s recommendations and instructions.
MAM-MM-166
Alfie’s mother, a seasoned veterinary nurse with 18 years of experience, immediately recognized the type of break and braced herself for the usual treatment—a heavy, restrictive cast. But the local medical team in Orlando had a different idea.
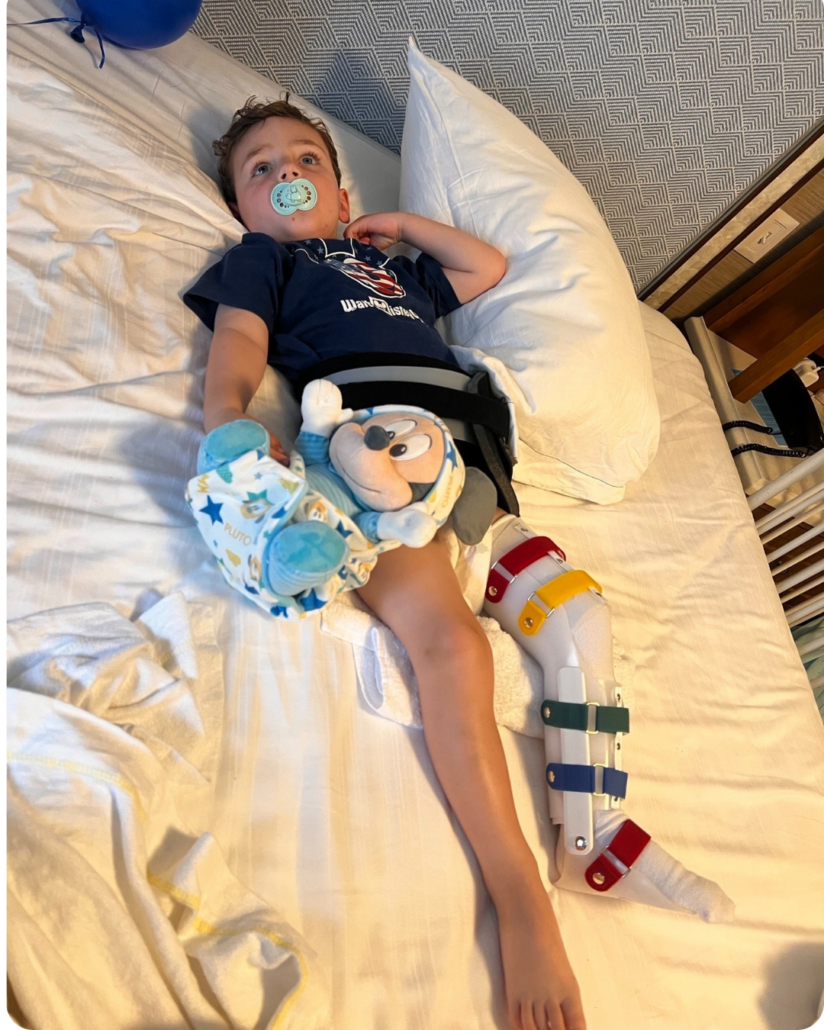
The DF2 brace turned out to be a game-changer. Designed with KIDS in mind, it featured colorful Velcro straps, a lightweight structure, and breathable materials—all of which made it far more comfortable than a traditional cast.
“It’s simple to use, feels light, and looks fun for kids,” Alfie’s mom noted.
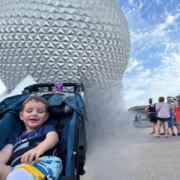
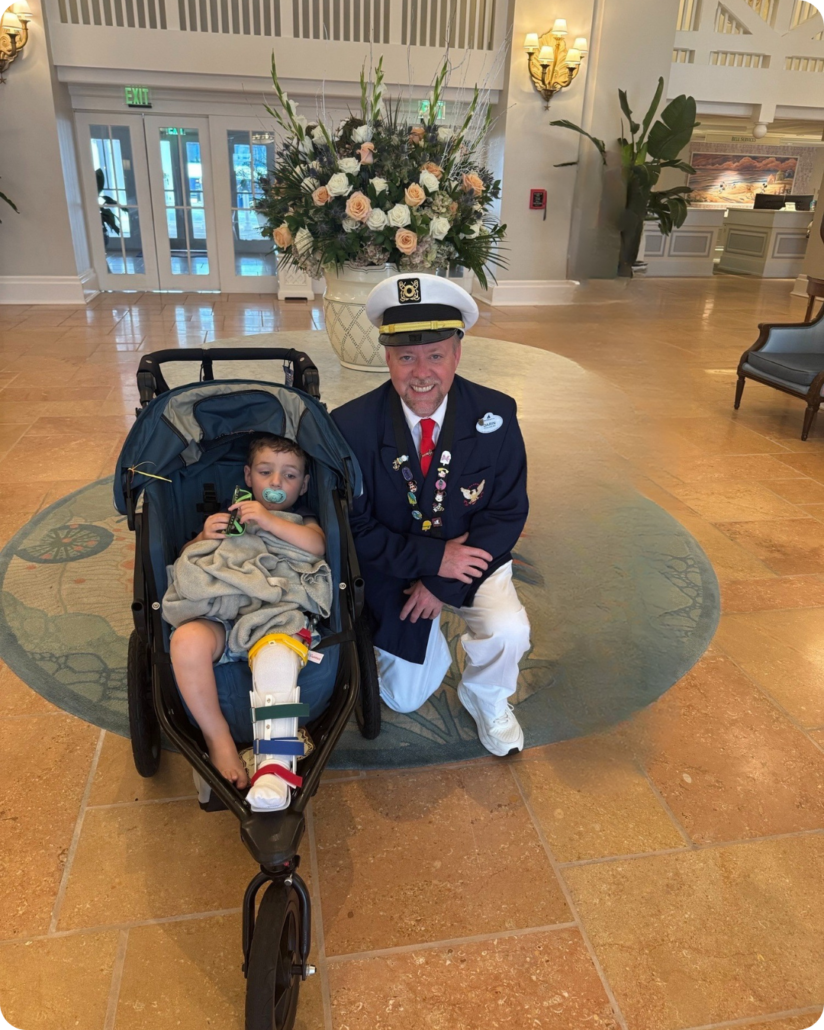
Alfie wore the brace without complaint. Unlike a cast, it didn’t cause itching or discomfort, and it allowed him to move more freely. This mobility meant that even with a broken leg, Alfie could still enjoy Disney and Universal parks.
The brace also made life easier for Alfie’s parents. Bathing him was no longer a stressful ordeal, and even changing his diaper was straightforward—something that’s often a challenge with a full leg cast.
“Bathing Alfie was stress-free since the doctors cleared us to remove it while giving him a bath. Even changing his diaper was easy, not awkward like with casts.”
Back home on the Isle of Man, hospital staff were able to remove and replace the brace easily for follow-up x-rays. This flexibility eliminated the need for cast saws and reduced the stress of follow-up care.
Despite the family’s initial concerns about whether a brace could provide adequate support, Alfie’s recovery has been smooth. The DF2 allowed him to stay active without pain or frustration, and his fracture is healing well.
“Our time at Disney and Universal was affected, but the DF2 brace helped Alfie enjoy the parks as much as possible.”
From both a medical and parental perspective on the DF2 Fracture Brace, “I highly recommend it” remarks Alfie’s mom, “light, breathable, and a lot more practical than a traditional cast.”
The DF2® Fracture Brace provided the support her son needed while preserving the joy of their family vacation.
Disclaimer:
OrthoPediatrics is an exclusive licensee of the DF2 Registered Trademark.
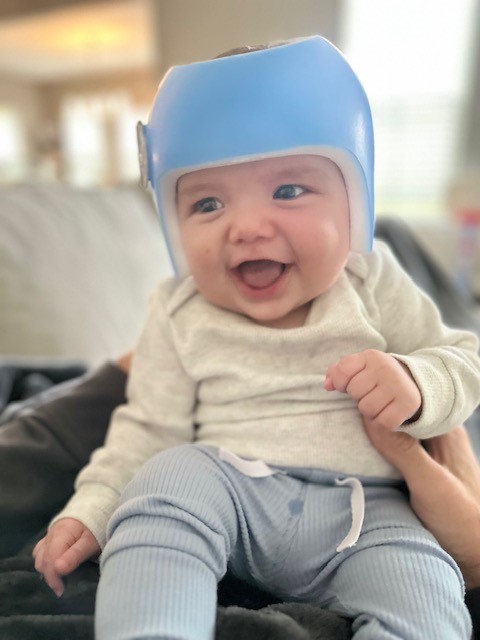
When Jackson was born, his parents already knew what to look for. Their older son, Ethan, had also experienced plagiocephaly, so they were familiar with the early signs.
“Within Jackson’s first month, we noticed some flattening on the back of his head. At his two-month checkup, our pediatrician confirmed our concerns,” his mom recalls. “He mentioned that Jackson’s flattening was actually more pronounced than Ethan’s had been at the same age.”
Because of their past experience, Jackson’s family knew early intervention was essential—and they moved quickly to begin the evaluation process.
Even though they weren’t new to the diagnosis, they carried lessons from their first journey through helmet therapy.
“With our oldest, we faced challenges like skin sores, fit issues, and unclear communication. We just wanted things to be smoother and more supportive this time.”
Determined to find a better experience for Jackson, the family explored new care options—and discovered OP Specialty Bracing (OPSB)’s brand-new Columbus, Ohio clinic.
“No parent wants to hear their baby needs a helmet, but we knew acting quickly would give Jackson the best outcome. The longer we waited, the harder it would be to correct.”
Because Jackson’s condition appeared early, his parents understood that conservative measures like repositioning and tummy time might not be enough on their own. With guidance from their pediatrician, they decided to start helmet therapy early to take advantage of the rapid growth phase.
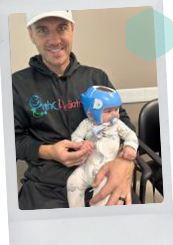
From the first appointment, the family knew they’d made the right choice. “Our experience with OPSB has been so positive and professional. The team has been clear, supportive, and genuinely invested in Jackson’s progress,” his mom said.
Their trust in the team also came from a personal connection. “I’ve worked with Orthopediatrics, OPSB’s parent company, for five years. I already knew the organization’s mission and how much they care about children and families. Partnering with OPSB felt natural—it was working with people who truly put kids first.”
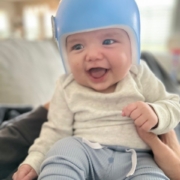
Jackson began treatment with the OPSB Boston Band, and the results came quickly. “The adjustment phase went better than we expected—no major discomfort, no irritation, and Jackson was wearing the helmet for 23 hours a day by the second day,” his mom said. At his three-week checkup, the family got incredible news: Jackson’s head shape had already improved significantly. “It was so encouraging to see visible progress so soon. After our first experience, we were amazed by how well this process has gone.”
While the family admits there are still daily tasks—like cleaning the helmet and checking for redness, those challenges feel minor compared to the long-term benefits. “The emotional side can be hard at first because no one wants their baby to need extra care,” they reflected. “But seeing Jackson adapt so quickly reminds us this is just a short phase for a lifetime of benefit.”
“Plagiocephaly is common and highly treatable and there are amazing teams out there who will guide you through it. The helmet might seem like a big deal right now, but it’s such a short chapter in your child’s story, and it can make an incredible difference for their future.”
Disclaimer:
OPSB products and products distributed by OrthoPediatrics Corp. and its subsidiaries should be used under the guidance of a qualified healthcare professional. Individual results may vary. The Boston Band® is intended for medical purposes to passively hold prominent cranial regions of an infant’s skull in order to improve cranial proportion and symmetry in infants from three to eighteen months of age, with nonsynostotic positional plagiocephaly, including infants with plagiocephalic, brachycephalic and scaphocephalic patterned head shapes. The device is also indicated for adjunctive use for infants from three to eighteen months of age whose synostosis has been surgically corrected, but who still have moderate to severe cranial deformities including plagiocephalic-, brachycephalic-, and scaphocephalic-shaped heads. Please consult your pediatrician or orthopedic specialist for professional advice. This content is for informational purposes only and does not constitute medical advice. Always follow your doctor’s recommendations and instructions.
MAM-MM-086