Alma’s Story- A Clubfoot Journey


Clubfoot means a baby is born with a foot or both feet turned inward. This common condition makes it hard for kids to stand or walk the usual way. With the right treatment, most children grow up able to run, play, and join in all the fun life offers.
Parents often feel worried after hearing the word “clubfoot,” but you are not alone. Doctors understand clubfoot well and many helpful treatments are available. Learning about these treatments can help families feel informed and hopeful as they get their child the care they need.
Once clubfoot is diagnosed, families start to look at what can be done to help their child’s foot get into a corrected position and become stronger. There are a few main treatment options, each with its own steps and reasons. Getting familiar with these choices lets parents feel more in control and ready for what comes next.
The Ponseti Method is the most common and consider the gold standard of clubfoot treatment around the world. Doctors use it for most babies as soon as possible after birth.
Here’s what happens with the Ponseti Method:
The Ponseti Method works well for most babies because it is gentle, does not require big surgery, and lets kids use their feet normally as they grow. Doctors pick this method first because it has a high success rate, low risk, and helps most children avoid surgery.
Some families and doctors choose a different path called the French Functional Method. This approach uses hands-on physical therapy instead of repeated casting and is only available in certain locations.
With the French Method:
The French Functional Method can work well when the doctors and therapists are trained and experts in this method. It is best when families are motivated and can come to therapy often. Over time, this method can help the foot grow straighter by teaching muscles and joints to move in healthier ways.
Parents choosing this option can expect a lot of at-home work and a strong partnership with their therapy team. If the foot is not improving as hoped, sometimes doctors will switch to the Ponseti Method partway through care.
Surgery used to be the main way doctors treated clubfoot, but this has changed. With better results from the Ponseti and French methods, surgery is now a backup plan.
Doctors think about surgery when:
Clubfoot surgery can mean a few different things. Sometimes, it’s a small procedure to release a tight tendon. Bigger surgeries can involve moving or lengthening muscles, tendons, or even cutting bones. These surgeries help bring the foot into a better position but sometimes lead to stiffness, pain, or trouble moving the foot as the child grows.
Doctors only recommend major surgery when other treatments do not help. Today’s approach is to avoid surgery when possible, as gentle early treatments give most kids the best chance for strong, flexible feet.
After a diagnosis, the focus shifts to how to help babies with clubfoot grow and develop as normally as possible. Early and proper treatment sets kids up to walk, run, and play with little or no limits. Parents often feel overwhelmed at first, but clear steps and steady routines can make a big difference for newborns facing clubfoot and parents first learning about the diagnosis.
Treating clubfoot works best when started soon after birth. The first days and weeks are when babies have very soft bones and tissues, so gentle corrections are easier and cause less discomfort. Starting early also keeps babies on track with their movement milestones.
Doctors usually begin treatment in the first one or two weeks of life. If clubfoot goes untreated, the foot becomes stiffer and harder to correct over time, which might lead to more complex treatments later.
The Ponseti Method has become the main way doctors treat clubfoot. It is known for being gentle, safe, and highly effective. Parents play a huge part in making it a success. Here are the main steps, explained in simple terms:
These steps allow the baby’s foot to reshape and grow like a healthy foot. Skipping or shortening these steps can cause clubfoot to return.
Success in clubfoot treatment often comes down to simple, steady steps at home. Parents become the most important team members. Here are some best practices for making sure treatment works:
Kids are naturally curious and often pull at their braces, but families who stay patient and consistent see the best long-term results.
Ongoing communication between the family and the care team helps keep treatment on track. Doctors, nurses, and therapists support parents with advice, coaching, and help if problems pop up. Parents often become experts in their child’s care and learn to spot small changes before they become bigger issues.
Families can ask questions like:
Reliable, open communication supports a child’s journey from treatment to healthy, active play.
Many parents worry about keeping their baby comfortable during treatment. While babies often adjust quickly, a few tips help make casts and braces easier for both baby and family:
Each family’s day-to-day life looks different, but small changes to routines can add up for comfort and success.
Regular follow-up visits let your care team watch your child’s progress and catch problems early. Most families visit the clinic several times in the first year, then less often as the child gets older.
Here’s a sample timeline for clubfoot check-ins:
| Stage | Clinic Visit Frequency |
| Serial Casting | Every week |
| Transition to Bracing | Every 1-3 months |
| Ongoing Bracing | Every 3-6 months |
Seeing steady improvement with each visit builds both parent and child confidence in the treatment process. Parents may want to keep notes about brace time, skin changes, or anything that feels off—this helps guide each appointment.
With early action, partnership, and a steady routine, nearly all children treated for clubfoot go on to walk, run, and keep up with their peers. Treatment is a journey, but every step forward adds more hope and strength to a child’s future.
Treatment for clubfoot does not finish when the last cast comes off or when bracing slows down. Ongoing care gives kids the best chance at a healthy, active life. By following up with your care team and sticking with a long-term plan, you build strong habits that protect your child’s progress. Let’s look at what families need to know about follow-up visits and how clubfoot care shapes a child’s future.
Regular check-ins with your doctor are key for clubfoot care. The risk of the foot turning inward again is highest in the early years. Sticking to follow-up visits helps catch any signs of relapse early and adjust treatment if needed.
During these visits, your care team might:
A simple delay in these visits can lead to bigger problems later, so building them into your family’s life is important.
You know your child better than anyone else. You see changes before anyone else does. Keep an eye out for these warning signs between check-ups:
If you spot any of these, inform your doctor. Quick action can lead to easy fixes instead of bigger setbacks down the road.
Kids treated for clubfoot want to keep up with their friends at school and on the playground. Most can run, play sports, and do what other children do. Families help young children build confidence by encouraging active play and healthy movements.
Here are some easy tips:
Some children need special stretches or exercises as they grow. Your care team will show you what to do at home if needed.
Even after early treatment, clubfoot can return. This is called a relapse. Almost all relapses happen because the brace is not used as much as needed in the early years. Staying on track with bracing and follow-ups keeps relapse rates low.
Ways to prevent relapse:
If relapse happens, many cases can be treated with more casting or gentle stretching. Rarely, a minor surgery is needed. Quick action makes recovery much easier.
With modern treatments like the Ponseti Method, the long-term outlook for children with clubfoot is bright. Most children grow up with feet that function almost like anyone else’s. Some may have minor differences such as a slightly smaller calf or a foot that is not as flexible, but these rarely slow them down.
Here is how long-term outcomes look for most children treated for clubfoot:
| Outcome | What Families Can Expect |
| Walking/Running | Normal for almost all children |
| Playing sports | No limits for most kids |
| Pain or stiffness | Rare with early and steady care |
| Shoe choices | In rare cases special shoes |
| Recurrence risk | Low when bracing is followed |
Your partnership with doctors, steady routines, and belief in your child’s strength will make a big difference in long-term results. Every family’s journey is unique, but strong follow-up care gives the best chance for active, happy years ahead.
Early action gives children with clubfoot the best chance for healthy, happy lives. Modern treatments like the Ponseti Method help most kids walk, run, and play with their friends. The key steps: diagnosis, gentle stretching or casting, and steady follow-up—build a strong path to success.
Families who work closely with their care team see real progress. Every step taken, from that first cast to the last brace, leads to more freedom and confidence. Clubfoot may feel overwhelming at first, but hope and progress go hand in hand for families who seek help early.
Thank you for taking the time to learn about clubfoot and its treatment. If your child has been diagnosed, know that you are not alone and that support is always available.
Disclaimer:
OPSB products should be used under the guidance of a qualified healthcare professional. Individual results may vary. Please consult your pediatrician or orthopedic specialist for professional advice. This article is for informational purposes only and does not constitute medical advice. Always follow your doctor’s recommendations and instructions.
IAM-MM-046
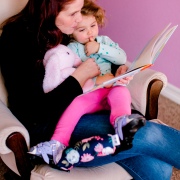
Bringing home a new baby is full of joy, but sometimes the journey comes with a few twists. Brittany Ouimette, a first-time mom, had her world turned upside down shortly after the birth of her daughter. Her baby was diagnosed with hip dysplasia and needed treatment with a Pavlik harness. Brittany’s story, filled with honest emotion and real-life advice, is one every parent dealing with hip dysplasia will find relatable and reassuring.
Here, you’ll find Brittany’s experience with the diagnosis, the steps her family took from hospitals to at-home care, how they adapted, and practical tips for managing daily life with a harnessed baby. If you’re a parent in the same situation, this story can help you feel less alone, more informed, and a bit more confident as you start down this path.
Brittany’s story began just hours after her daughter was born. During a routine check, the pediatrician noticed her baby’s hip “clicking” in and out of place and quickly asked, “Was this baby breech?” Brittany and her husband confirmed she was, which didn’t seem unusual until the doctor brought up hip dysplasia, a condition more common in breech babies and firstborn girls.
“We had never heard of this,” Brittany remembers. The doctor explained the basics, told them about the Pavlik harness, and suggested looking up a picture. The brace looked odd and intimidating, a reminder that their newborn might need something very different in her first weeks of life.
That first talk with the pediatrician didn’t bring many answers. Brittany and her husband were told the condition might fix itself on its own once newborn hormones wore off. The plan was simply to “wait and monitor.”
No resources or handouts came their way. “We didn’t really do anything until she was six or seven weeks old,” Brittany shares, so she turned to the internet.
Common worries new parents may have after hearing ‘hip dysplasia’:
While some family and friends tried to reassure Brittany with, “Oh, it’ll be okay,” she needed something different. “I know it’s going to be okay, but I’m a little sad about it,” she says. What she craved was not fast comfort but understanding and real information.
“I wanted to understand what we were working towards.” She needed clarity, for her own peace of mind, but also so she’d be able to answer the inevitable questions from others.
Like many new parents faced with something unfamiliar, Brittany hit Google and social media. She searched for stories from other moms, hoping for honest, direct parent-to-parent advice beyond just the technical medical explanations.
She found plenty of “mommy blogs,” mostly from the UK and Australia, and each seemed slightly different:
Reading these stories helped Brittany prepare mentally for “the worst” but also added to her worries, as some sources made the experience seem more rigid and severe than what she later found to be true for her own child.
What calmed her most was her own provider, who took the time to show Brittany and her husband how to get the harness on and off safely and how to adjust it as their daughter grew. They could bathe her, snuggle, and even dress her normally.
Tip Box:
Always follow your healthcare provider’s instructions, every child’s hip dysplasia case is a bit different, and what works for one family may not be right for yours.
The internet is a deep well. Brittany realized that when she started comparing every story she read to her own. “It’s easy to start generalizing when you haven’t had your own experience yet,” she says. She encourages parents to gather information, but to keep in mind that only parts of what you read may apply to your case.
Top Advice When Researching Online:
At her baby’s one-month appointment, the pediatrician still noticed the hip clicking and ordered an ultrasound at the hospital’s radiology department.
The scan was simple: her baby lay calmly while a technician moved her hip gently to capture images. The tech didn’t diagnose anything on the spot. Instead, they sent images back to the pediatrician, who then confirmed hip dysplasia and referred Brittany to a pediatric orthopedic specialist.
Meeting the specialist, Brittany and her husband listened as they explained angles, numbers, and “coverage” related to the hips. “It didn’t make any sense at first,” Brittany shares, recalling a blur of charts and diagrams. Over several appointments, though, things became clearer. The more she asked, the more confidence she gained.
The Pavlik harness fitting involved soft, Velcro straps, sized for her baby. The team marked spots with a permanent marker so they’d know where to position things later. The message Brittany took home: “You got this!”
Brittany admits feeling overwhelmed trying to absorb every detail, partly for herself, but also to answer the questions she knew would come from family and friends. “People kept saying, ‘Oh, but it’ll be okay.’ I needed more than that. I needed to know when and how it was going to be okay.”
Before the harness went on, Brittany’s biggest concerns were both practical and emotional.
First: the look and hassle. “It’s inconvenient and not very cute. People stare or ask questions.”
Second: Would it work? Would they “do everything right” to help their daughter’s hips heal?
She faced a new layer of parenting, explaining a visible brace to others. “It’s different when everyone can see what your child is wearing. You answer a lot of questions.”
Real Talk: Many parents feel sadness, frustration, or worry when their baby needs a medical device. These feelings are normal, acknowledge them, don’t judge yourself.
Brittany’s daughter started with the harness at seven weeks old. The first 24 hours, she fussed—her now-spread legs didn’t move like before. Surprisingly, after a day or two, she seemed completely unbothered, stretching with joy when the harness came off but never battling its return.
Some parents Brittany met found their children took longer to adjust, sometimes weeks. Each baby is different, and that’s normal.
For Brittany, caring for her baby in the harness took about a week of practice before it felt routine. Diaper changes were awkward at first, no more lifting by the legs. Instead, she rolled her baby or lifted her by the back or hips.
Over days, tasks that felt cumbersome at first became second nature. “Other people would watch and think it looked so complicated, but we got used to it.”
Specialists guided her through adjusting the harness as her baby quickly outgrew the early settings. After a few trips, she felt confident handling tweaks on her own.
The good news: most normal baby clothes fit under the harness. Brittany found that pants or onesies with snaps sometimes needed to be a size up, as the spread legs stretched the fabric more. She usually dressed her daughter underneath the harness, slipping a bigger shirt or dress over the top for outings or special occasions.
While there are specialty pants designed for harnesses, Brittany didn’t find them essential.
“The harness will get dirty, and that’s okay,” Brittany says plainly. Spit-up, diaper blowouts, and the general mess of baby life all left their mark, especially over ten weeks.
She cleaned it with a damp washcloth and mild laundry soap during the daily hour the harness was off. She avoided the washer and dryer, too risky with all the Velcro and not enough time between wears. She also tried harness covers, which snapped over the straps. They made things cuter and easier to keep clean.
Harness covers and putting a shirt or dress on top helped prevent stains, but Brittany’s biggest change was a mental one. “At the beginning we were so careful, but by the end, we just accepted that it was going to look used.”
Quick Tips for Harness Cleaning and Care:
Every four weeks, Brittany’s family went in for ultrasounds and check-ins with the orthopedic team. Most babies wear the harness for several weeks to a few months; for Brittany’s daughter, it was ten weeks in total.
Each visit meant either the doctor or Brittany herself needed to lengthen the harness straps slightly as her baby grew. Babies grow fast, usually an adjustment about every two weeks. This level of frequent tweaking may not be necessary for other braces, like those used for clubfoot, as growth patterns differ.
By the end of ten weeks, one hip had fully healed. The other, though, showed less progress. This sometimes happens and means more treatment is needed, a reminder that these journeys are unique for each child.
It’s normal to feel scared, sad, or wonder, “Why me?” if your baby is diagnosed with hip dysplasia. Many families have been where you are, and there is a path through it. Treatments are common and outcomes are overwhelmingly positive.
Be patient with yourself. Learning a new way of caring for your baby will come with mistakes and awkward moments, but it gets easier every day. The weeks may seem long now, but they’ll feel like a small chapter when you look back.
Brittany says, “It might feel foreign or strange, and you might wonder why this happened to your baby. Just know there are plenty of other parents out there who have gone through it. It’s treatable, and it passes faster than you think. One day, you’ll look back and it’ll just be part of your child’s story.”
“We remember thinking it was so long and hard, but now, did that even happen? It went by so quick. Now it’s just part of her story, and we look back and smile.”
You don’t have to do this alone. Whether you’re searching for other parents’ stories, learning how to adjust a Pavlik harness, or just needing reassurance that your feelings make sense, Brittany’s story proves that support, information, and a little patience go a long way. Treatment feels tough in the moment, but over time it fades into the story of your family’s strength and adaptability.
Disclaimer:
OPSB products should be used under the guidance of a qualified healthcare professional. Individual results may vary. Please consult your pediatrician or orthopedic specialist for professional advice. This article is for informational purposes only and does not constitute medical advice. Always follow your doctor’s recommendations and instructions.
At a routine checkup, you notice your baby’s thigh folds don’t line up, or the hips feel stiff when the nurse moves their legs. Your mind jumps to big worries and you start searching for clear answers.
Hip dysplasia in infants means the hip joint doesn’t form as it should, so the ball of the thigh bone doesn’t sit snug in the socket. Common signs include a soft clicking sound in the hips, uneven creases in the thighs, or one leg that looks a bit shorter. Some babies also have limited hip movement.
It’s more common than it sounds, affecting about 1 in 1,000 babies, and early detection helps prevent long-term problems like pain and arthritis. Most cases are found in the first months, when treatment is gentlest and recovery is most effective.
In this guide, you’ll learn the main treatment options for hip dysplasia in infants, from soft-positioning devices like the Pavlik harness to braces, closed reduction with a cast, and surgery when needed. With prompt care and good follow-up, most babies recover fully and go on to crawl, walk, and play without limits.
Early treatment steers the hip into a healthy position while bones and soft tissues are still flexible. Most babies respond well to soft braces that guide the ball into the socket without surgery. Care is team-based, with an orthopedic specialist fitting the device, nurses teaching daily care, and regular imaging checks, usually ultrasounds at first, then X-rays as the bones harden.
These methods protect normal growth, reduce pain later in life, and often prevent the need for surgery. With good fit and consistent use, success rates are high.
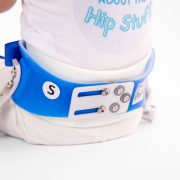
The Pavlik harness is a soft brace with straps around the shoulders and legs. It holds the hips flexed and gently turned out, often described as a relaxed frog-like position. This keeps the femoral head centered in the socket so the joint can mold into the right shape.
Daily life looks different at first, but it becomes routine. Use these practical tips to keep your baby comfortable and on track:
What to expect over time:
A quick note on results: Consistent wear drives success. If the harness is not worn as prescribed, the chance of full correction drops.
If the Pavlik harness does not maintain hip position, or if the baby is closer to 6 months, doctors may recommend a more structured brace. Devices like the Ilfeld splint or the von Rosen splint are rigid and hold the hips in a set abducted and flexed position to keep the joint centered.
What sets these devices apart:
Quick comparison for context:
| Device | Structure | Typical Age | Wear Pattern | Usual Monitoring | Reported Success |
| Pavlik harness | Soft straps | Newborn to <6 months | 24/7, then wean | Ultrasound, clinic checks | Over 90% when early and compliant |
| Ilfeld splint | Rigid abduction bar | Up to ~6 months | Near full-time | Ultrasound then X-ray | About 80–85% |
| von Rosen splint | Rigid frame | Up to ~6 months | Near full-time | Ultrasound then X-ray | About 80–85% |
How to choose the next step:
These braces keep treatment non-invasive and protect growth while giving the hip more control. With structured support and steady follow-up, many babies avoid surgery and go on to crawl and walk on time.
When bracing does not hold the hip in place, or when a baby is diagnosed after 6 months, surgery steps in as a safe next move. Procedures happen under general anesthesia with close monitoring. Teams at pediatric centers perform these operations often, with strong outcomes and low complication rates. Most hips stabilize well after treatment, and most children will walk normally.
Parents play a big role in recovery. You will help with cast care, pain control, and follow-up visits. Your care team will guide each step so you never feel alone.
Closed reduction re-centers the hip without a cut on the skin. It is common for babies between 6 and 18 months when bracing is not working.
Here is how it usually goes:
What to expect after surgery:
Family support matters:
Expected outcomes:
Risks are uncommon:
Open reduction helps when the hip keeps slipping out, when tissue blocks the socket, or when closed reduction does not hold.
What happens in an open reduction:
About osteotomy:
Care setting and safety:
Recovery and follow-up:
Key benefits you can count on:
Short list of risks and how teams reduce them:
Surgery sounds big, yet it is routine in children’s hospitals and guided by clear protocols. With the right plan and steady follow-up, most babies heal well, move well, and grow into active toddlers.
Treatment is only the first step. Strong follow-up keeps the hip stable as your baby grows and moves more. You will partner with a pediatric orthopedist for checkups, imaging, and a simple home routine. With steady care, most children reach milestones on time and stay active without limits.
Expect regular visits so the care team can track hip growth and alignment. Frequency depends on age and treatment, but early follow-up is usually closer together.
Imaging confirms progress:
A quick snapshot of typical follow-up:
| Timeframe | Visit Frequency | Usual Imaging | Focus |
| First 6–12 months | Every 3–6 months | Ultrasound, then X-ray as bones harden | Position, stability, growth |
| 1–3 years | Every 6–12 months | X-ray | Socket depth, alignment |
| 4–10 years | As advised | X-ray if needed | Long-term shape, function |
Bring your questions and any photos or videos of your child’s walk or play. Small changes are easier to judge when the team can see them.
Therapy is rarely needed after bracing or surgery. The baby will develop motion on her own, and build up strength as she progresses. If the baby is falling behind, which is not common, the doctor will assess that.
Simple home habits help:
Activities to pause until cleared:
Ask your therapist for a short home plan. Two or three focused exercises a day make a real difference.
Most children do well. Still, call your care team if you notice any of the following:
Early calls prevent small issues from growing into big ones. Trust your instincts.
The outlook is strong. With early diagnosis and proper treatment, most children develop normal hip function and play sports without limits. Many families see typical crawling by the first year, walking by 12 to 18 months, and steady progress after that.
What supports the best outcome:
Some children need longer follow-up into grade school, especially after surgery. This is a safety net, not a setback. It keeps growth on track and protects hip health for the long run.
You do not have to figure this out on your own. Reliable, parent-friendly resources offer education, guides, and community:
Stay encouraged. Early treatment works, steady follow-up protects progress, and most treated babies grow into active kids with strong, pain-free hips.
Early detection through newborn screenings and well-baby visits sets the stage for success. Treatment options for hip dysplasia in infants range from the Pavlik harness and structured braces to closed reduction with a cast, then surgery for tougher cases. With prompt, guided care, success rates are high and most children develop strong, pain-free hips.
If you have any concern, call your pediatrician today and keep scheduled checkups. Share your experience in the comments and explore trusted resources like the International Hip Dysplasia Institute. This guide is educational, so always seek personalized advice from your medical team. Babies bounce back, and families overcome challenges together.
Disclaimer:
OPSB products should be used under the guidance of a qualified healthcare professional. Individual results may vary. Please consult your pediatrician or orthopedic specialist for professional advice. This article is for informational purposes only and does not constitute medical advice. Always follow your doctor’s recommendations and instructions.
MAM-MM-136